


When people think about calculations in Tableau Prep, many of them compare the much larger library of calculations available in Tableau Desktop. While it is true that Tableau Prep is limited, it does not discount the fact that the calculations available are very important for cleaning, transforming and reshaping your data. In this blog series, I'll be covering all of the different types of calculations in Tableau Prep, and examples of how to use them.
Today, we'll be looking specifically at the 'date' category within a calculated field.
The data we will be working with is the Tableau Prep Superstore Sample Flow, shown below. If you only care about the tutorial and not the setup, click here.
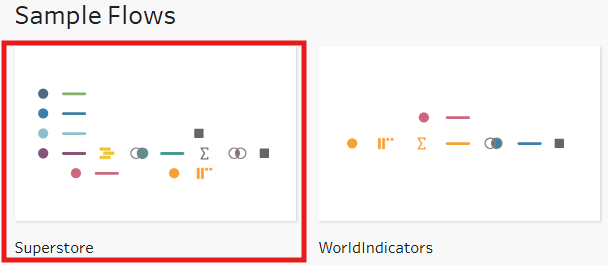
If you're following along, when you first open the Superstore sample flow, it'll look a bit overwhelming with a bunch of lines and symbols connecting to each other. For the sake of this tutorial (and all future tutorials), we will be removing everything after the union step.
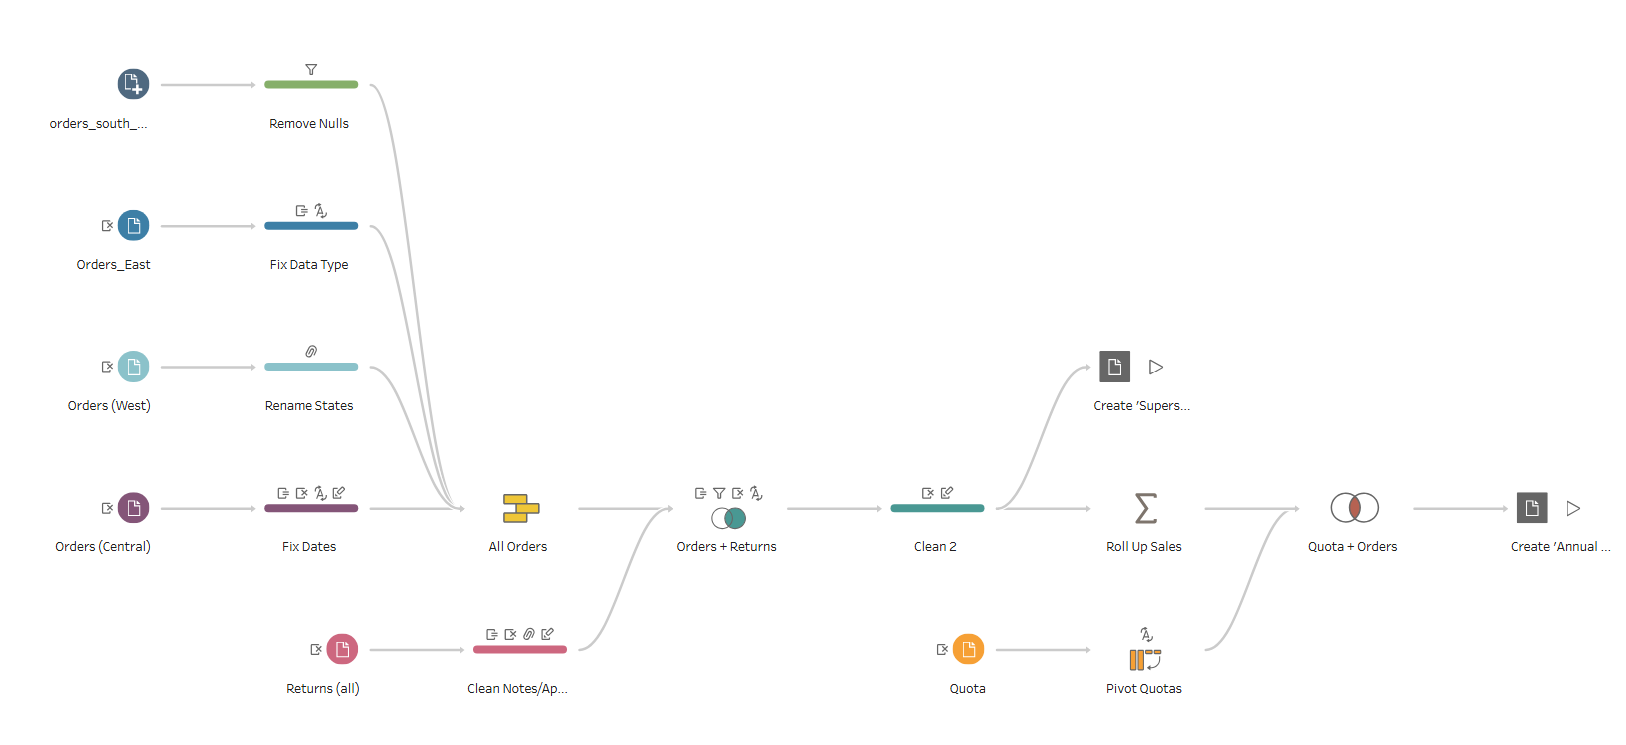
You can accomplish this by clicking and dragging over the area of items you want to delete, highlighting them. Press the delete key on your keyboard, and now you should have something that looks like this.
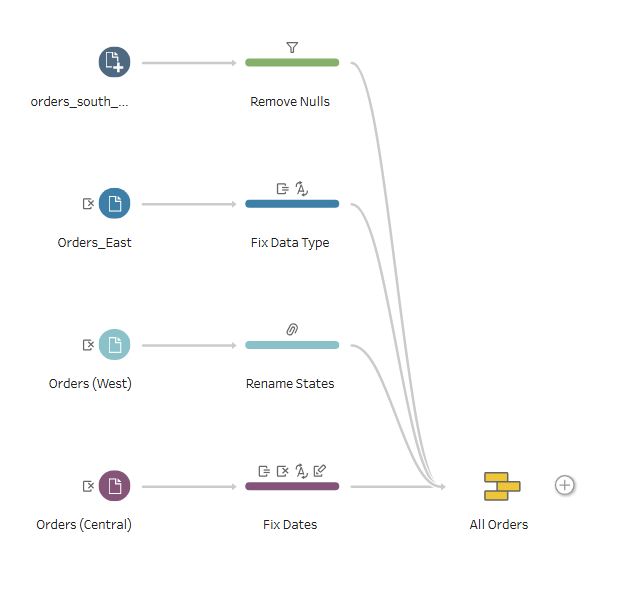
We can now press the '+' symbol on the right of 'All Orders', and choose clean step. This is just so we can see all of our data in one place. This should look like the following image:
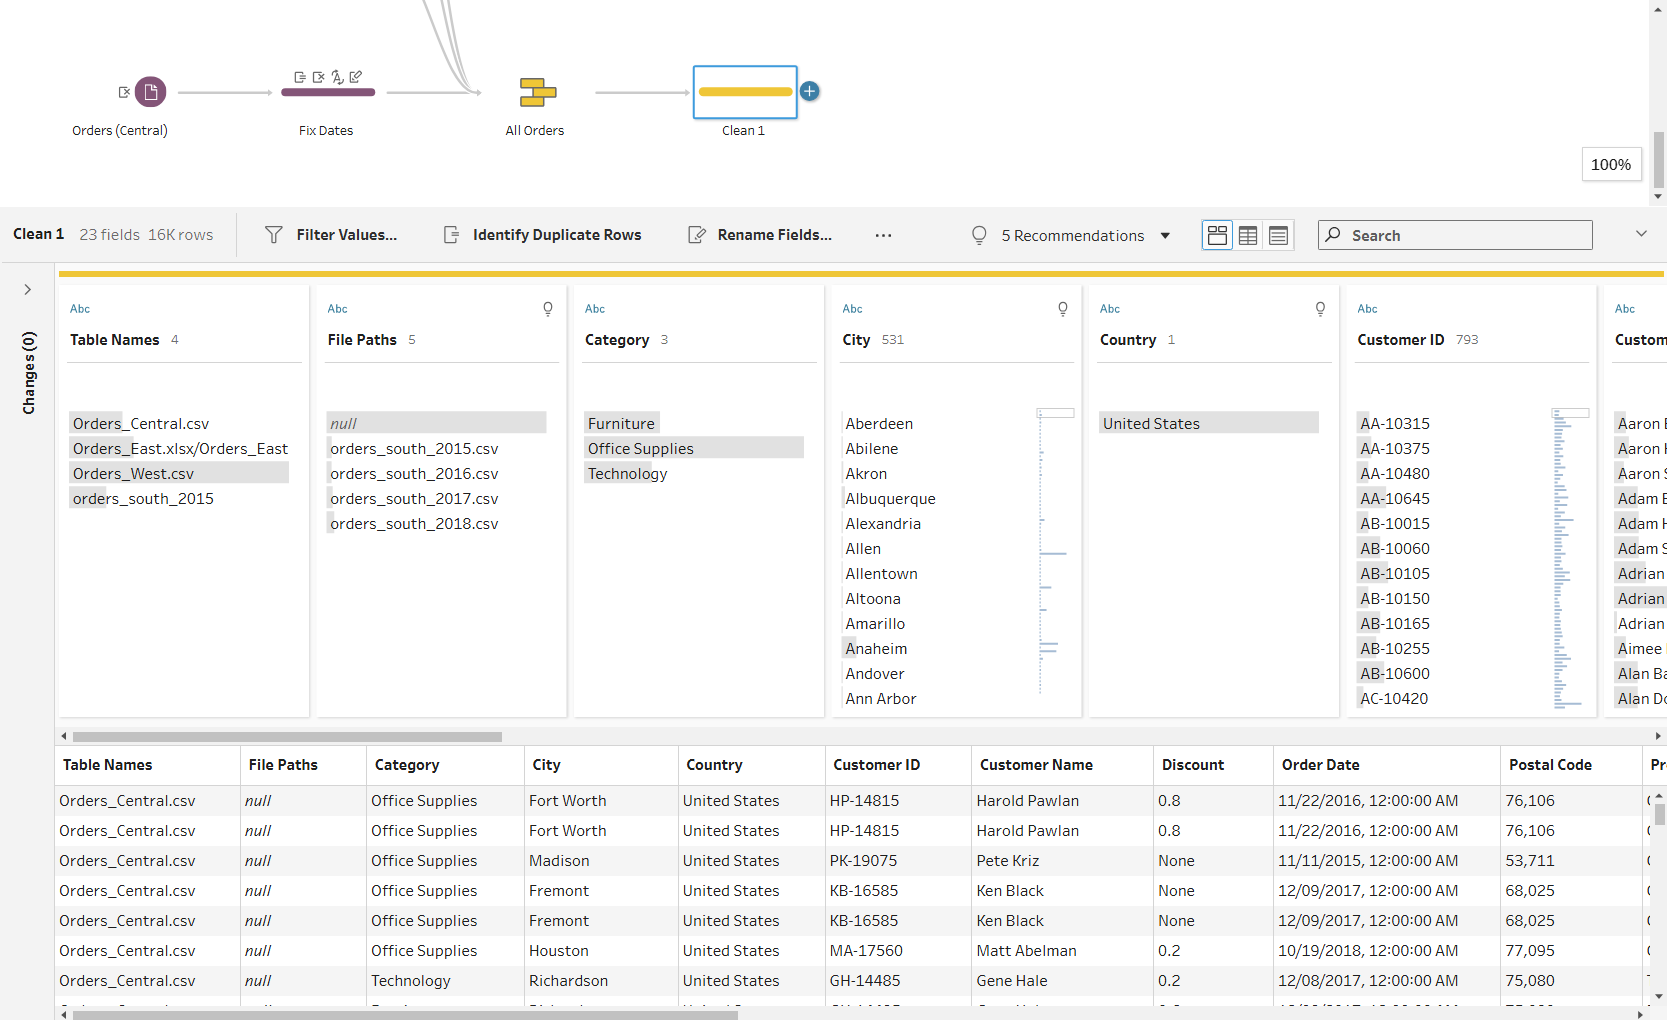
We can now actually scroll over, and start working with some dates. Lets focus on order date, where we will click on the ellipses menu (the three dots!) on the top right card as shown below.
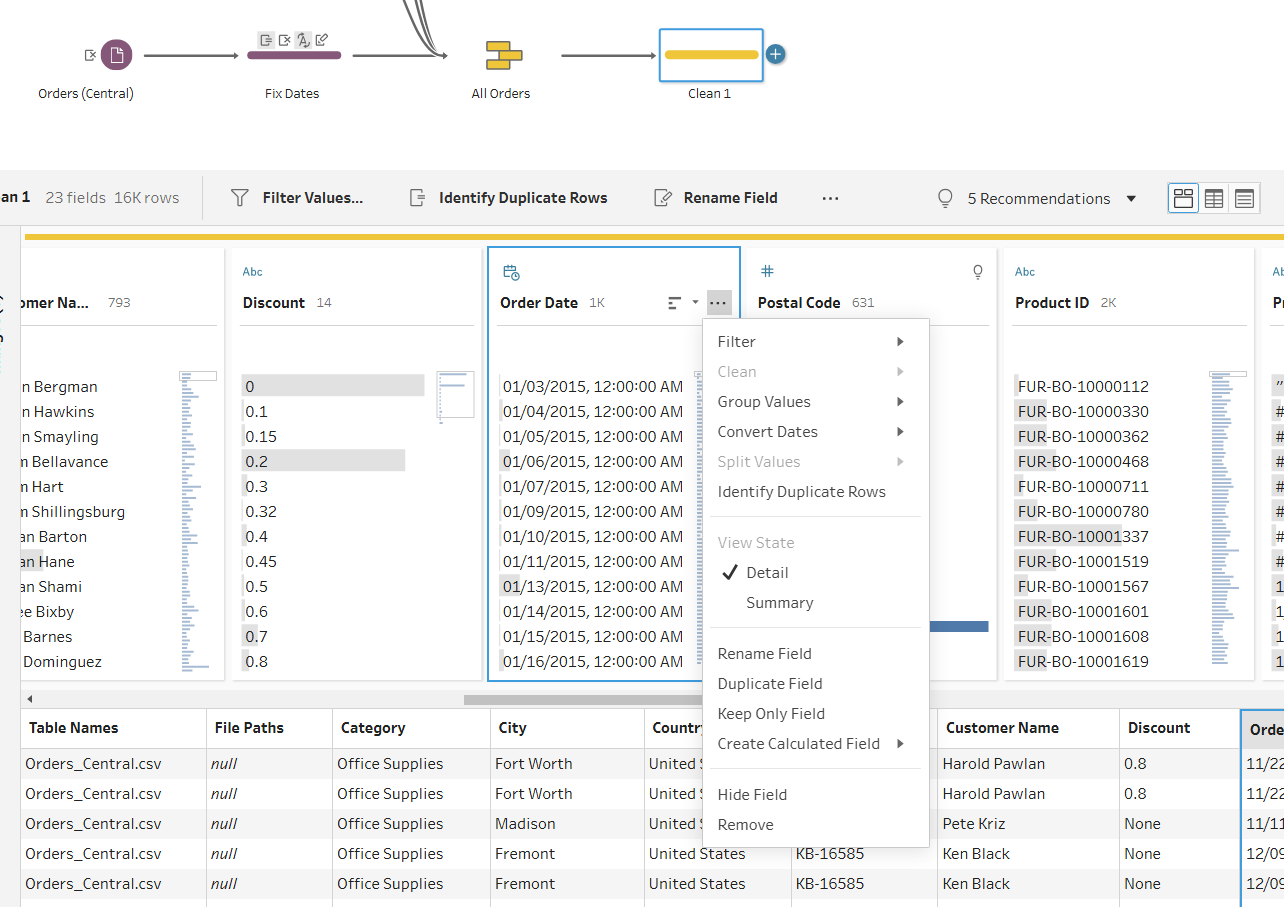
We are then going to click 'Create Calculated Field' and then click on 'Custom Calculation'. This brings up a new window, which is where our calculations will take place.
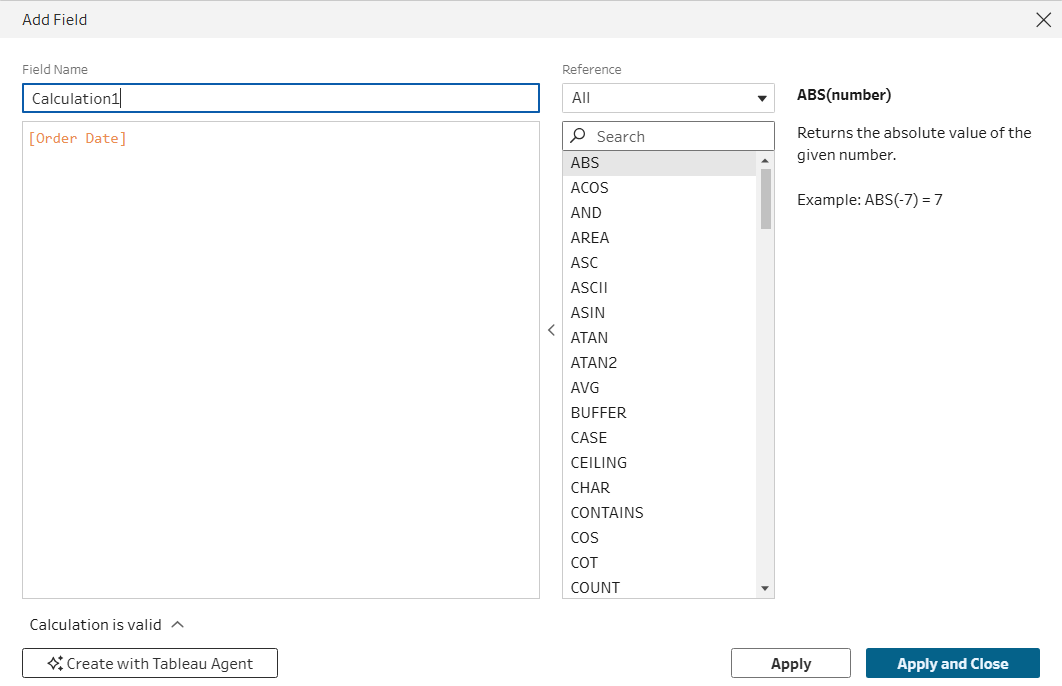
We are going to focus on the 'Date' category for today, so click on the 'Reference' drop down at the top, and choose 'Date'.
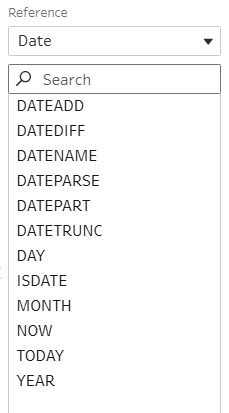
The Date Functions
To jump to a specific function, click on the links below!
DateAdd(you are here!)
DateAdd
The first function we're going to be looking at is 'DATEADD'. This function is mainly used to shift a date field forward or backward in time, which could be useful if the data was incorrectly recorded.
The format for using 'DATEADD' is as follows: DATEADD( '<date_part>', <interval>, <field>)
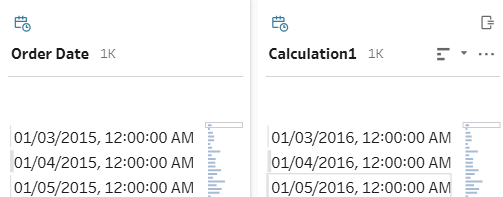
In our example, our <date_part> is set to year, and our interval is 1.
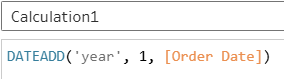
As we can see, all of our dates in [Order Date] have been shifted up by one year in Calculation1.
DateDiff
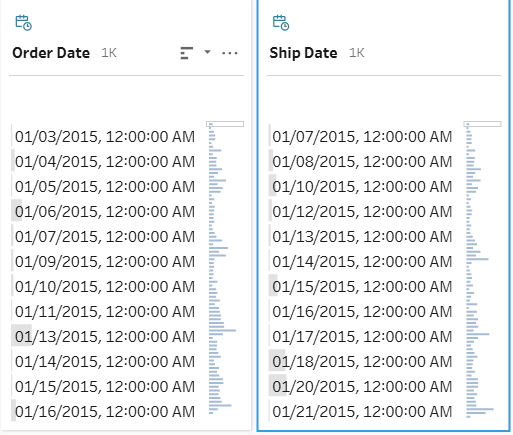
In this next scenario, we are going to specifically look at the difference in date between our [Order Date] and [Ship Date]. This is a pretty common case, where we want to look at how long it took between placing our order, and it actually being shipped. In the following image, I dragged the [Ship Date] pane right next to the [Order Date] pane to be able to see them side by side.
The format for this function is as follows: DATEDIFF( '<date_part>', <start_date>, <end_date>, '<start_of_week>')
If we omit <start_of_week>, it will be determined by the start_date from the data source.
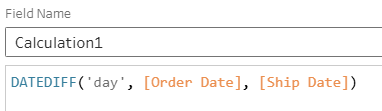
In our example, we look at the difference between start date and end date. DATEDIFF will subtract our [Start Date] from our [End Date]. In the following image, we see that we order this by the 'day'.
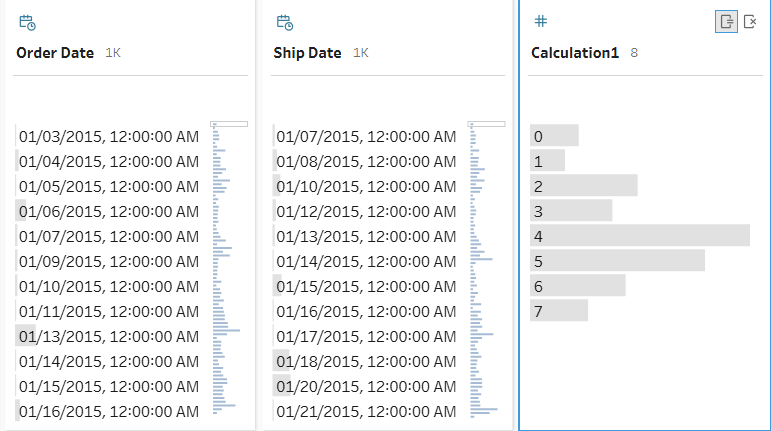
It looks like the maximum difference between order date and ship date is only a week! That's some pretty consistent shipping!
DateName
DateName is mainly used to find the day or the month name. It's a pretty simple function, as all it does is return the specified <date_part> as a string.
The format is as follows: DATENAME( '<date_part>', <field>)
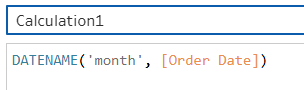
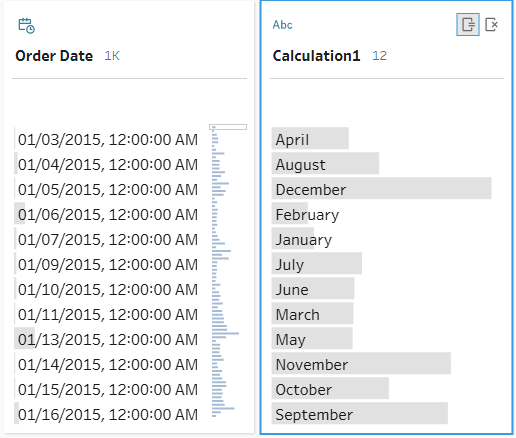
We are now able to see the spread for all month names within our order date field!
DateParse
DateParse is an extremely useful function, which allows you to convert strings into datetime, provided you give the right format. We unfortunately don't have any good strings to convert into datetime in this data set, so please reference this link for help!
DatePart
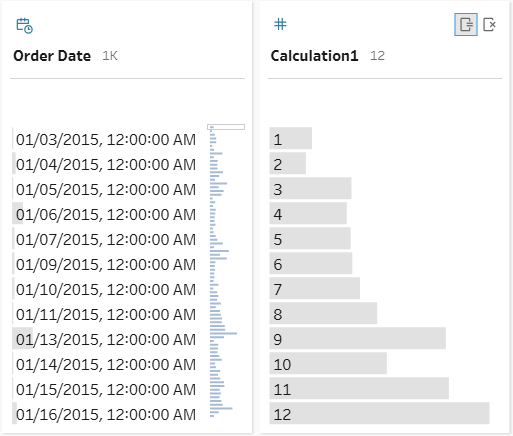
DatePart is used to return a part of the given date as an integer. For example, we wanted to find the month July as an integer, DatePart would return '7'.
The format for this function is as follows: DATEPART('<date_part>', <field>)
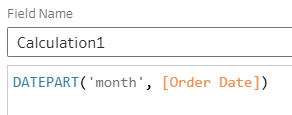
As we applied this calculation to [Order Date], we can see exactly how many orders were placed each month (as an integer!)
DateTrunc
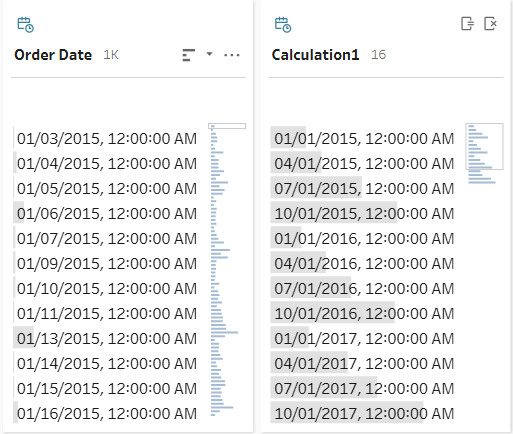
DateTrunc is used to truncate (aka shorten!) a date. In this case, we round down to the nearest level of detail. An example is rounding down to the beginning of the month or quarter. This might look like turning a date such as May 12th, into May 1st.
The format for this function is as follows: DATETRUNC('<date_part>', <field>)
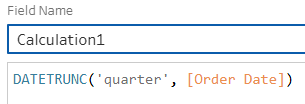
In this case, we rounded down all the dates to the beginning of the quarter, showcasing that the further we get into the year, the more orders are placed!
Day, Month, Year
These three calculations are all relatively simple, as they return the day, month, and year as integers.
They all follow the same format: DAY(<field>), MONTH(<field>), and YEAR(<field>)
Using the following date as an example: June 3rd, 2004
For the DAY() function, we would get '3' as an integer.
For MONTH(), we would get '6' as an integer.
Lastly, for YEAR(), we would get '2004' as an integer.
Now, Today
These two calculations are also quite simple and very similar in nature, with NOW() returning the current date and time, and TODAY() returning the current date.
If I were to use these functions(at the time of writing), NOW() would return '2026-05-22 8:06:23 PM', and TODAY() would return '2026-05-22'.
IsDate
The last function in this tutorial is ISDATE(), which returns true if a string is a valid date.
The format: ISDATE("2003-01-13")
This would return true, as it is a valid date.
Congrats!
You have reached the end of the Tableau Prep Date Calculation tutorial! Hopefully you find these explanations helpful! The next few posts in this series will most likely be broken down into smaller, more digestible chunks, as there are many more functions to go over. See you in the next one!