


Overview
I recently built a Python pipeline to fetch current weather data for London from the OpenWeatherMap API, and I wanted to share the process in a step-by-step guide. If you’re looking to learn how to combine API calls, Azure Blob Storage, and local CSV storage, this is a simple example you can follow.
Here’s what the pipeline did:
- Fetched weather data from OpenWeatherMap – I made a Python script that calls the API with London’s latitude and longitude, retrieving the current weather information.
- Added a timestamp – To keep track of when the data was retrieved, I added a 'current_time' field to the API response using Python’s datetime library.
- Stored the raw response in Azure Blob Storage – I uploaded the original JSON response to a “raw” container so I always have an unmodified version archived.
- Filtered the data for analysis – I then connected to the same blob again, extracted only the fields I needed (location, coordinates, temperature, weather status, description, and timestamp), and converted it to a clean, JSON string.
- Stored filtered data in a separate Azure container – This created a processed, ready-to-use version for analysis, separate from the raw data.
- Saved a local CSV – Finally, I converted the filtered JSON into a pandas DataFrame and saved it locally with a timestamped filename, so I could track and share it easily.
If you want to follow along or try it yourself, I’ve included the full script in this link and this blog covers a step-by-step explanations for each part.
Prerequisites
Before starting, ensure you have:
- Python 3.12+ installed
- Azure Storage Account. Create two blob containers called:
- open-weather-map-api-raw
- open-weather-map-api-filtered
- OpenWeatherMap API key
- Installed Python packages:
- pip install requests pandas python-dotenv azure-storage-blob
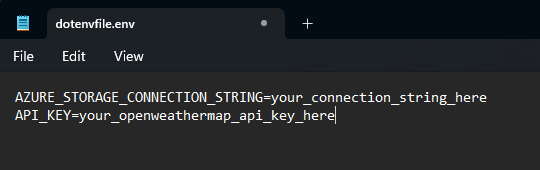
- A .env file that contains your Azure Connection String and API Key (like below)
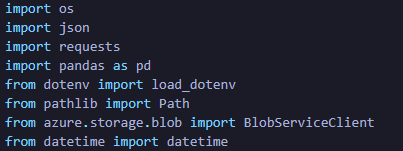
Step 0: Import required Libraries / Packages
Step 1: Load Environment Variables
We start by loading your Azure credentials and API key from a .env file. This keeps sensitive information secure and configurable.
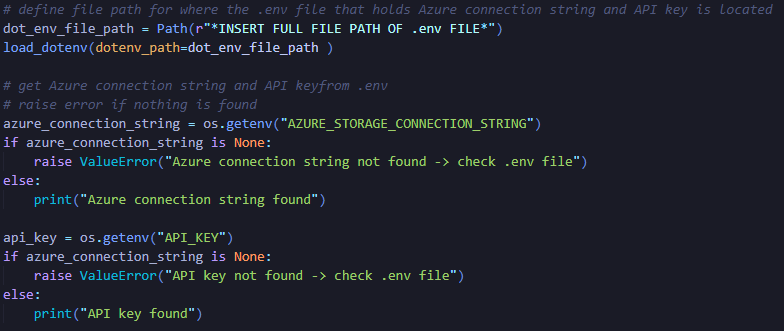
What this does:
- Reads the .env file in your project folder.
- Retrieves your Azure Storage connection string and OpenWeatherMap API key.
- Keeps credentials out of your code, so the script can be reused or shared safely.
Step 2: Authenticate to Azure Blob Storage
Next, we connect to Azure using BlobServiceClient and check available containers.

What this does:
- Authenticates your Python script with Azure.
- Lists containers to ensure access is working.
- Allows later operations like uploading or downloading blobs.
Step 3: Call the OpenWeatherMap API
We fetch current weather data for London using the API key.
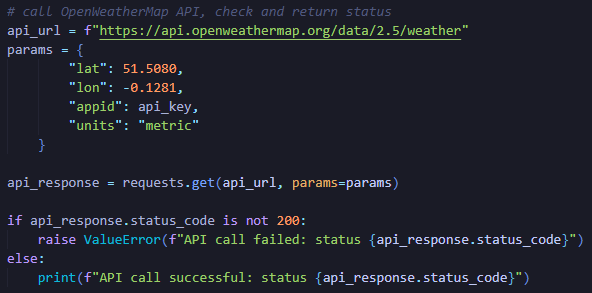
What this does:
- Sends a GET request to OpenWeatherMap with London’s latitude and longitude.
- Returns a JSON response with weather details.
- Ensures we can catch failed requests and handle errors.
Step 4: Add a Timestamp
We enrich the data with a retrieval timestamp for tracking and file naming.
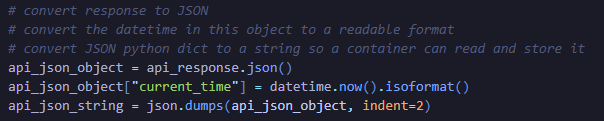
What this does:
- Converts the API response into a Python dictionary.
- Adds current_time to track exactly when the data was fetched.
- Converts the dictionary to a JSON string ready for storage.
Step 5: Upload Raw JSON to Azure
The raw API response is archived in Azure so we always have the original data.
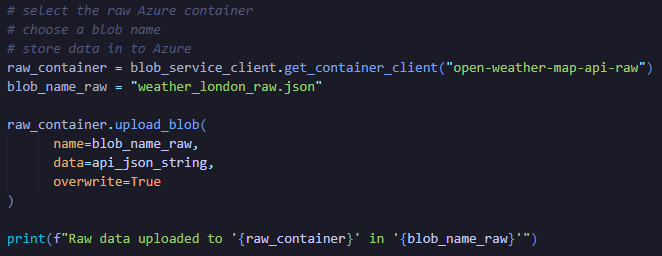
What this does:
- Stores the exact API response in Azure.
- Preserves data for auditing, reprocessing, or future reference.
Step 6: Download and Filter Raw Data
We reconnect to the blob to extract only the fields we need.
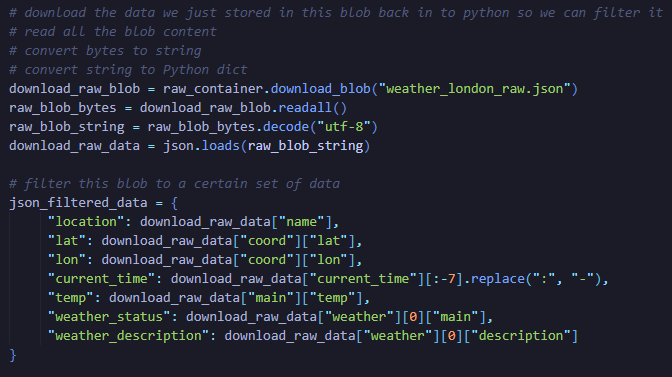
- Reads the stored raw JSON from Azure.
- Converts bytes → string → Python dictionary.
- Filters out unnecessary fields, leaving only analysis-ready data.
Step 7: Upload Filtered JSON
We save the filtered, clean data into a separate Azure container.
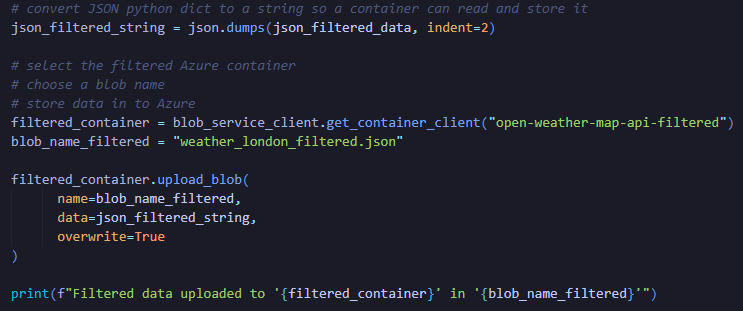
What this does:
- Keeps raw and filtered versions separate for auditing and clarity.
- Creates a clean dataset ready for reporting or analysis.
Step 8: Save Filtered CSV Locally
Finally, we convert the filtered data to a CSV for easy offline use.
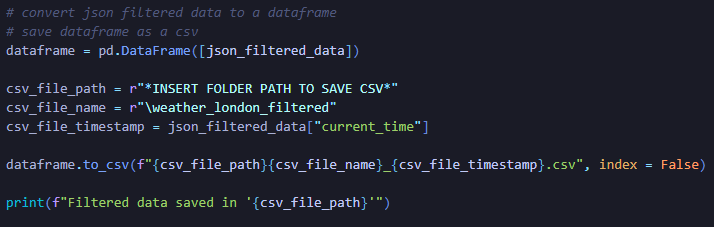
What this does:
- Converts JSON into a pandas DataFrame.
- Adds a timestamp to the CSV filename to track multiple runs.
- Makes the data immediately available for reporting, dashboards, or Excel analysis.
Summary
With just a few Python libraries and Azure Blob Storage, this pipeline:
- Secures credentials in .env.
- Authenticates to Azure.
- Fetches raw weather data from OpenWeatherMap.
- Archives the raw JSON in Azure.
- Filters key fields into a clean dataset.
- Saves the filtered data in Azure and locally as a CSV.
- This setup is reusable, extensible, and keeps both raw and processed data accessible for analysis, visualization, or reporting.