


The tooltip is a common graphical user interface element. It is used in conjunction with a mouse pointer. The user hovers the cursor over on one item or more in the view, without clicking it, and a small box appears with the name or description of the item being hovered over. So you can provide your users more detail about data.
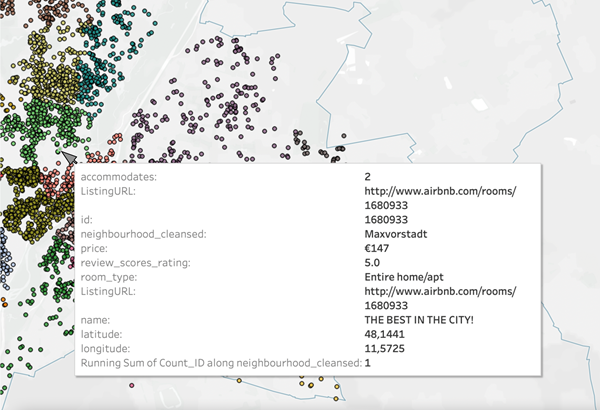

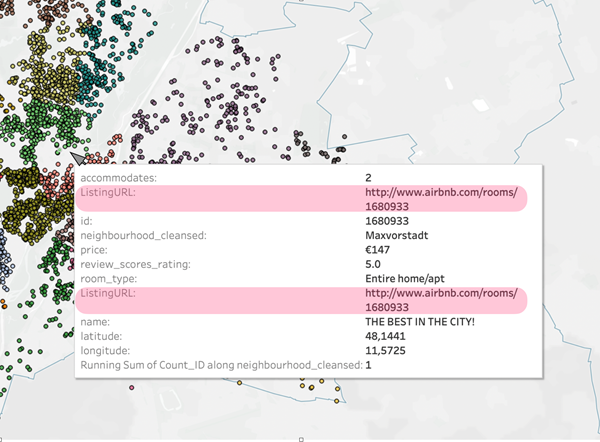
Tooltips also offer convenient ways to quickly filter or remove a selection, select marks that have the same value or view underlying data.
You can format tooltip text to make it useful and informative.
• Click the Tooltip button in the Marks card to open the Tooltip Editor. The formatting tools are along the top in the Edit Tooltip dialog box.
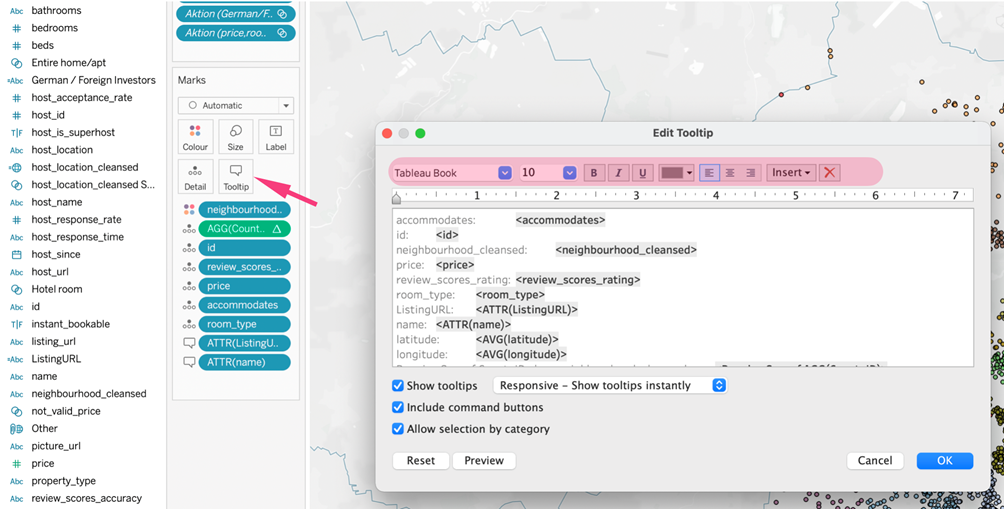
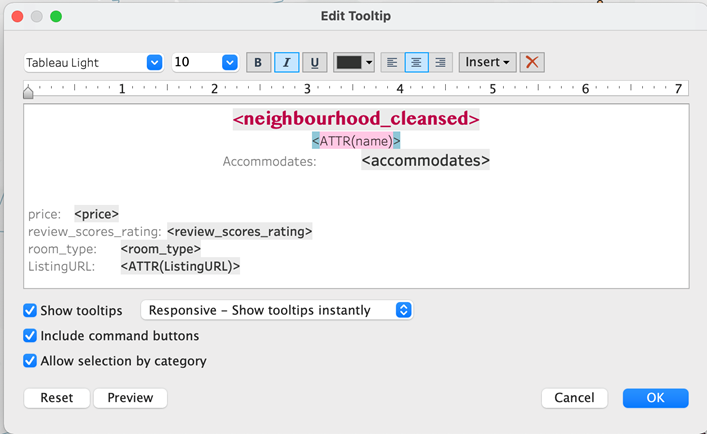
• Select tooltips and change their visual appearance using font, size or positioning.
• Choose "On Hover-Show tooltips on hover" and the tooltip delayed for ~3 second on mouse-over, so you can navigate into the tooltip window.
• Add the URL that relates to a particular data point.
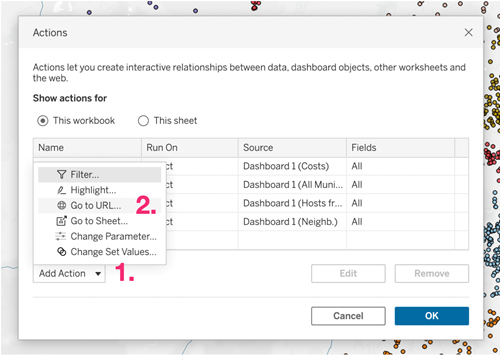
Go to Worksheet —> Actions.
From the actions window choose: Add Action (1.) —> Go to URL…(2.)
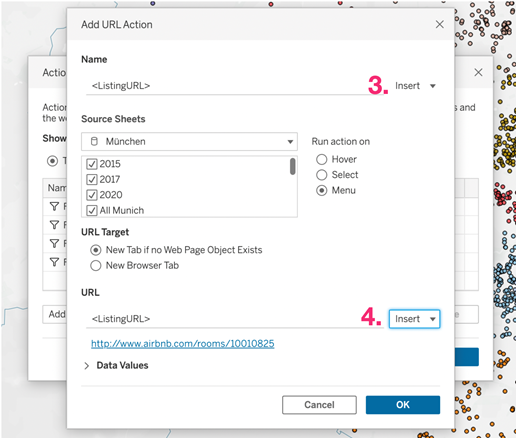
Then in the window that opens, put the Name (3.) (text to show, select the Run action on option to read "Menu", and then put the URL(4.) in the relevant field below, and press OK.
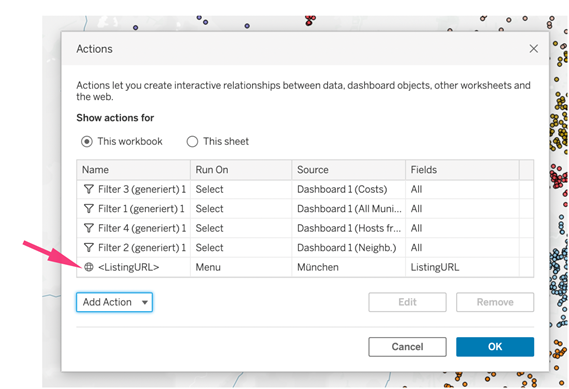
Your action is ready.
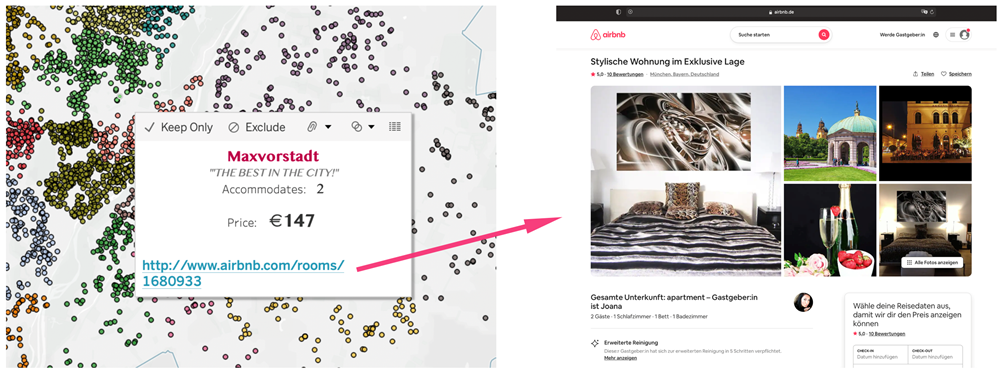
Seems good!