


Hex maps are generally difficult to be layered since their sizes can't be altered when using spatial files. In the midst of this, layered maps are aesthetically pleasing when we want to compare 2 different metrics on a specific dimension.
In this blog, I will take you through the steps in creating a layered hex maps. The spatial file I will be using is gotten from Joshua Mulligan and you can also download to follow along. This spatial file shall be used together with Sample Superstore data related on the state for the entire demonstration.
- Relate the spatial file and the Superstore data using state.

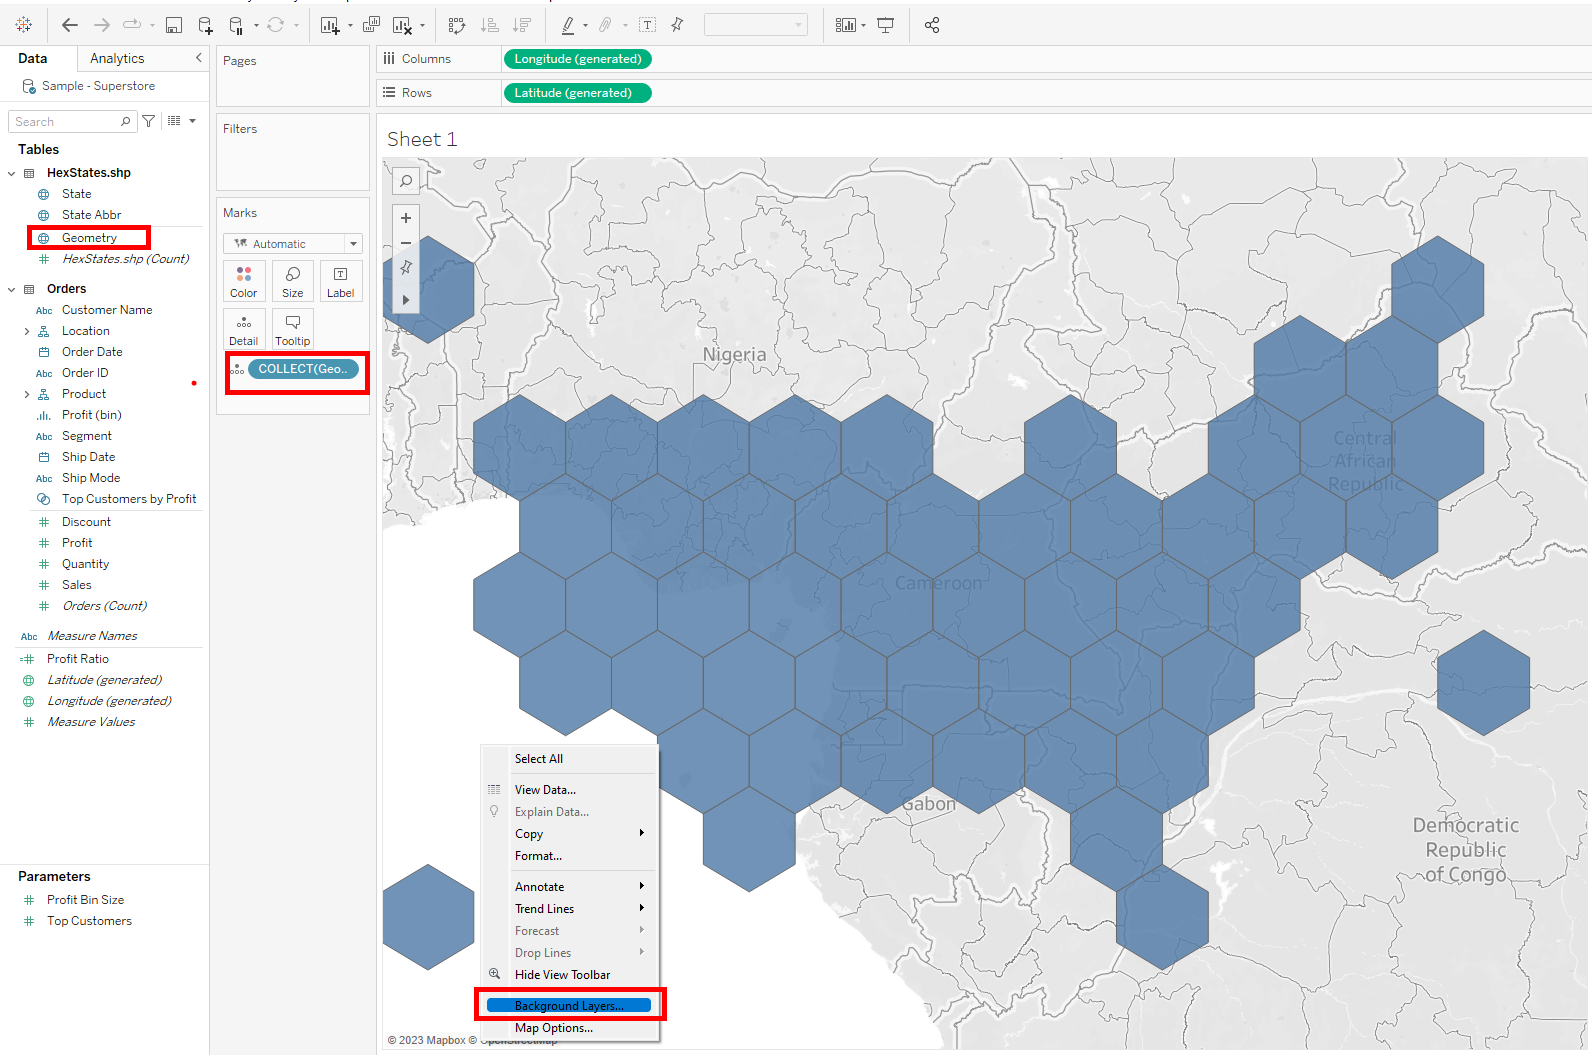
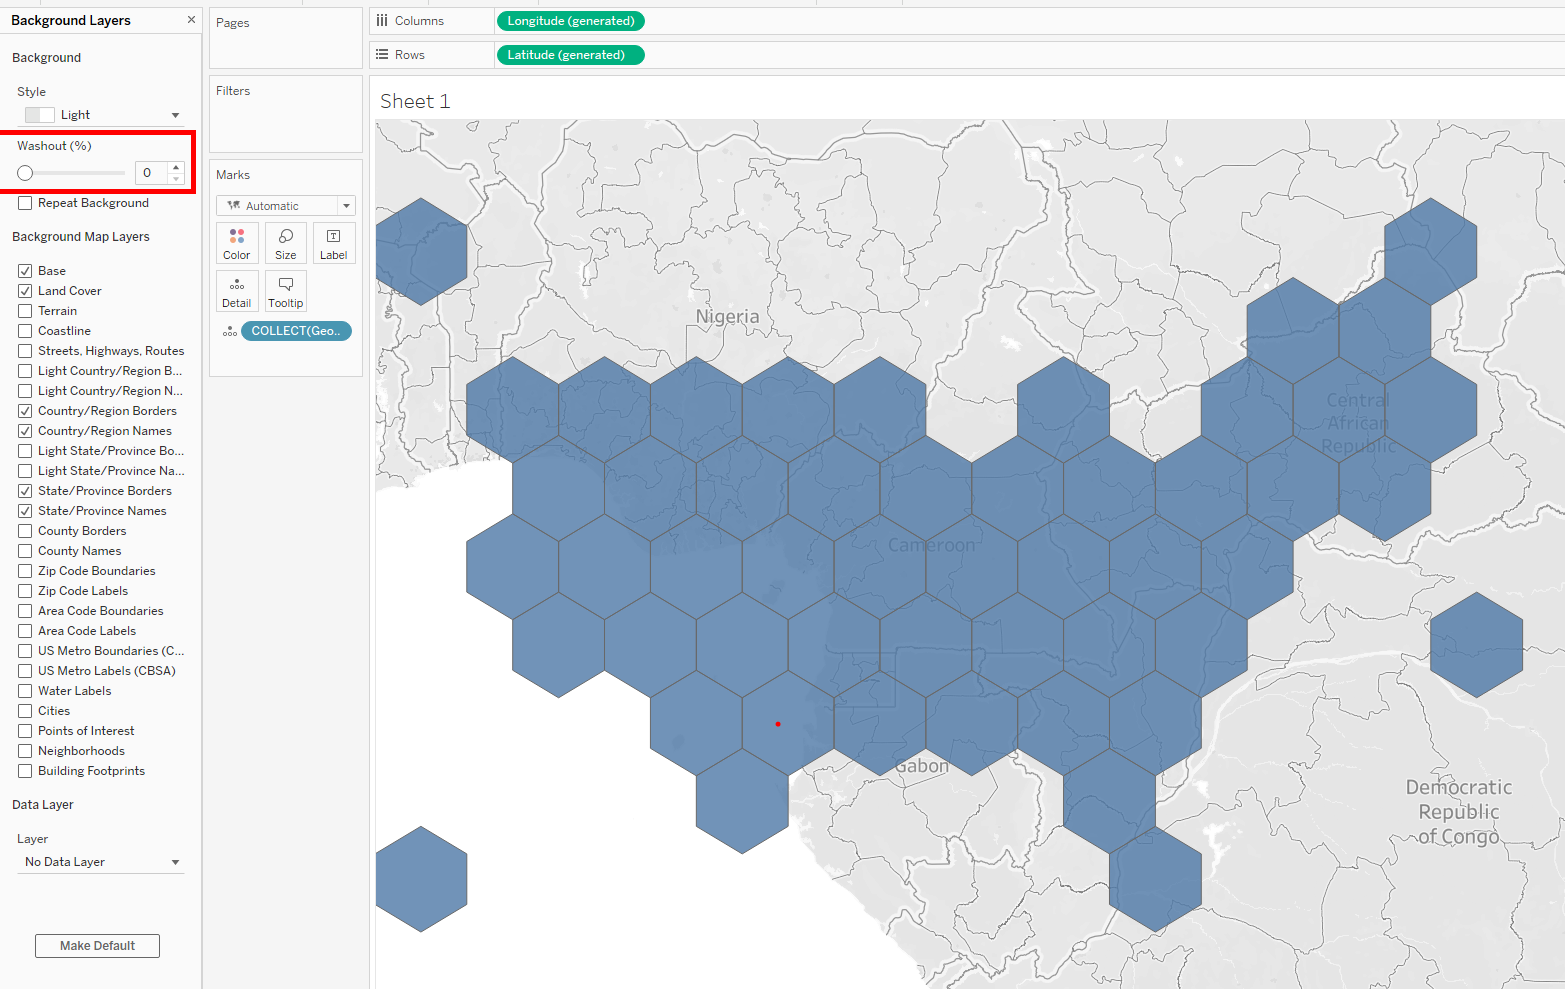
2. On the sheet double click Geometry. This takes it to the detail mark and brings up the hex map. Right click anywhere on the map and select background layers to wash out (100%) the map background to make it clean and also not appear to be in Africa.
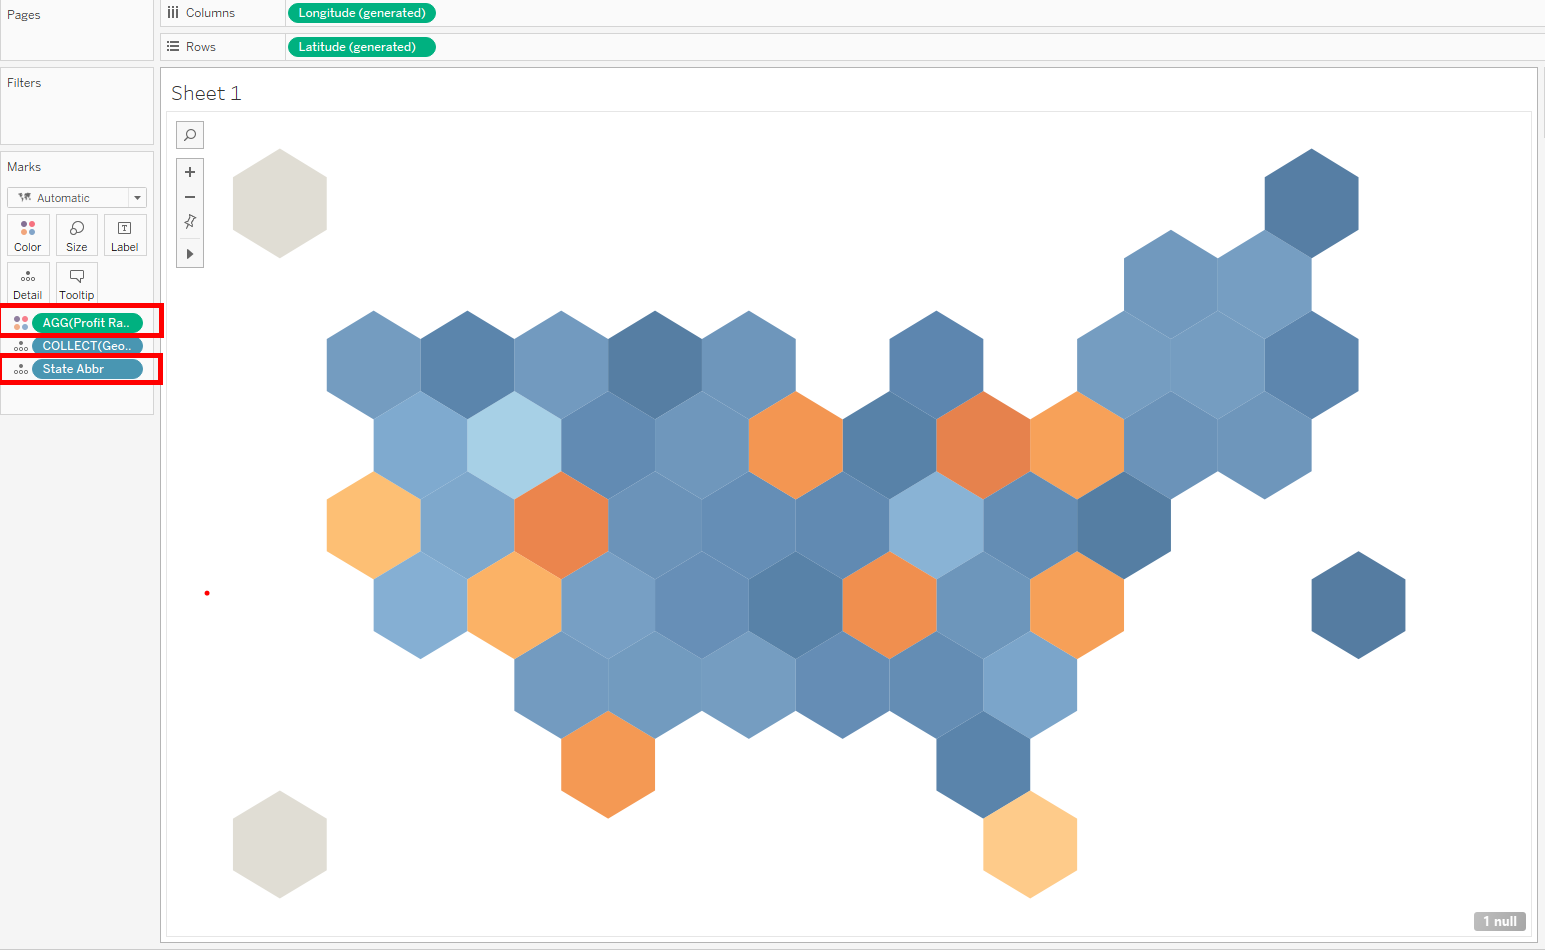
3. Define the hexagons by dragging state abbr to detail and drag profit ratio to colour.
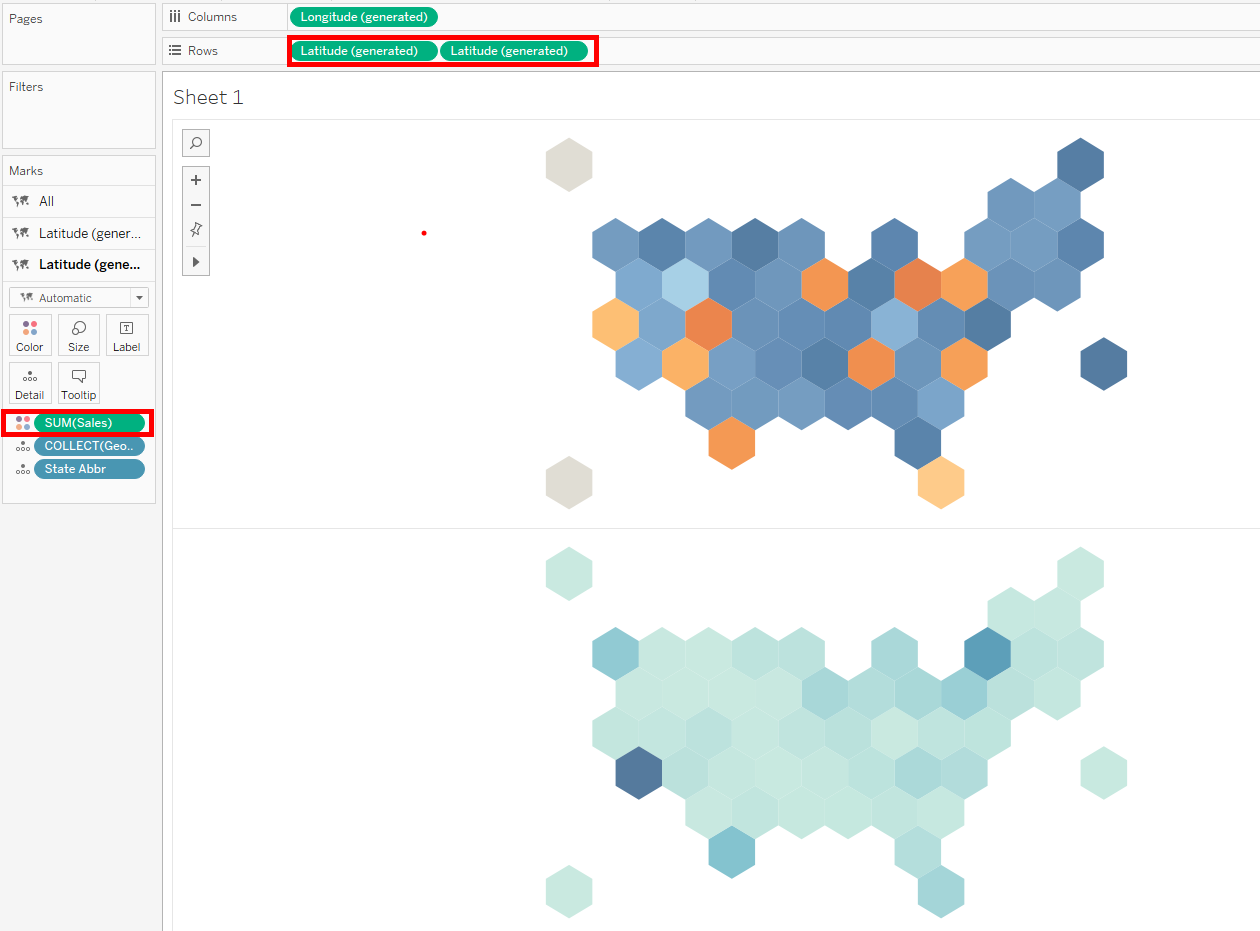
4. Duplicate the hex map and substitute profit ratio with sales on the second map.
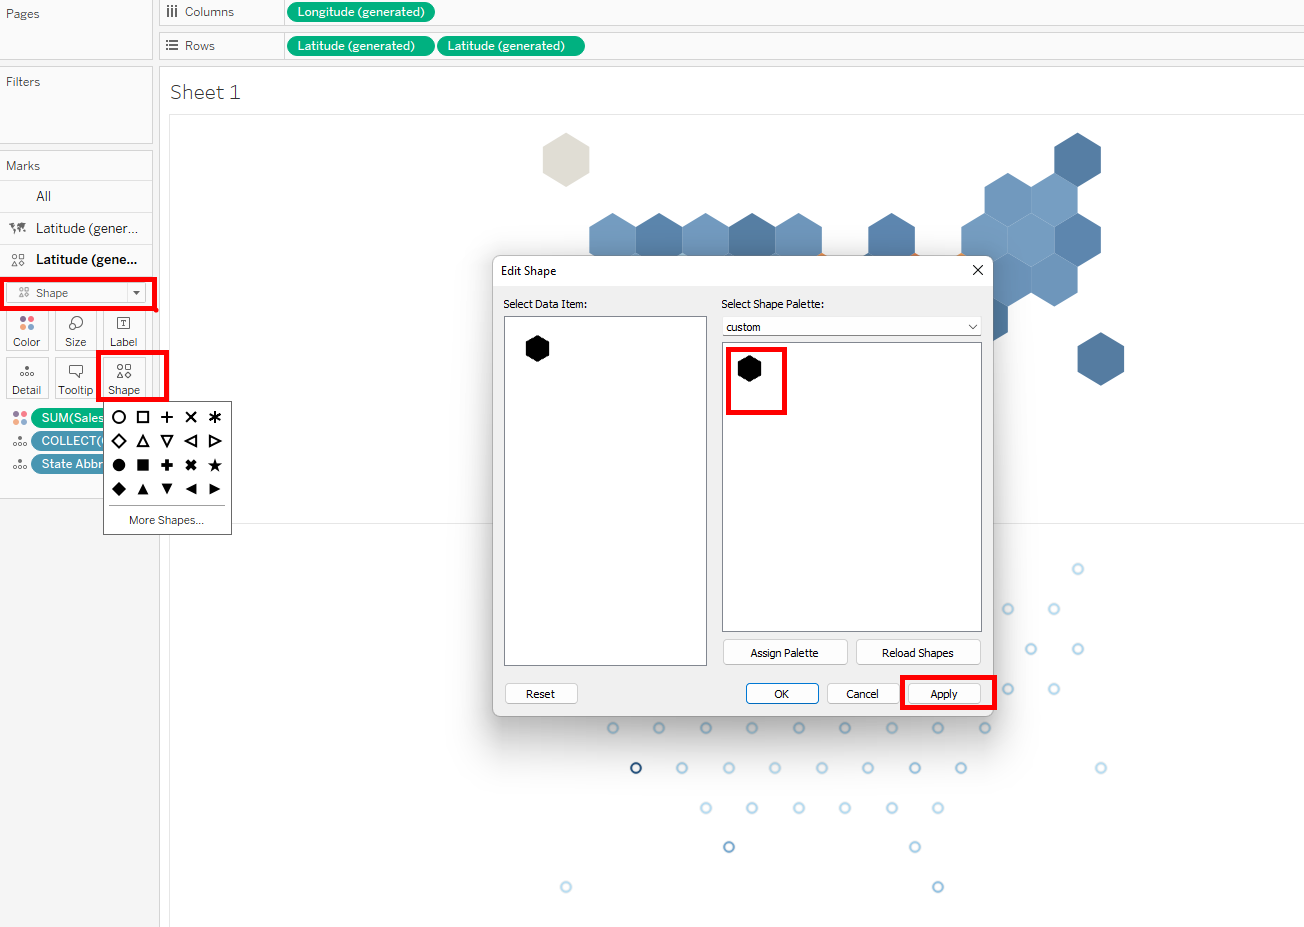
5. On the second map, change the mark to shapes and replace with a custom hexagon shape which needs to be self downloaded.
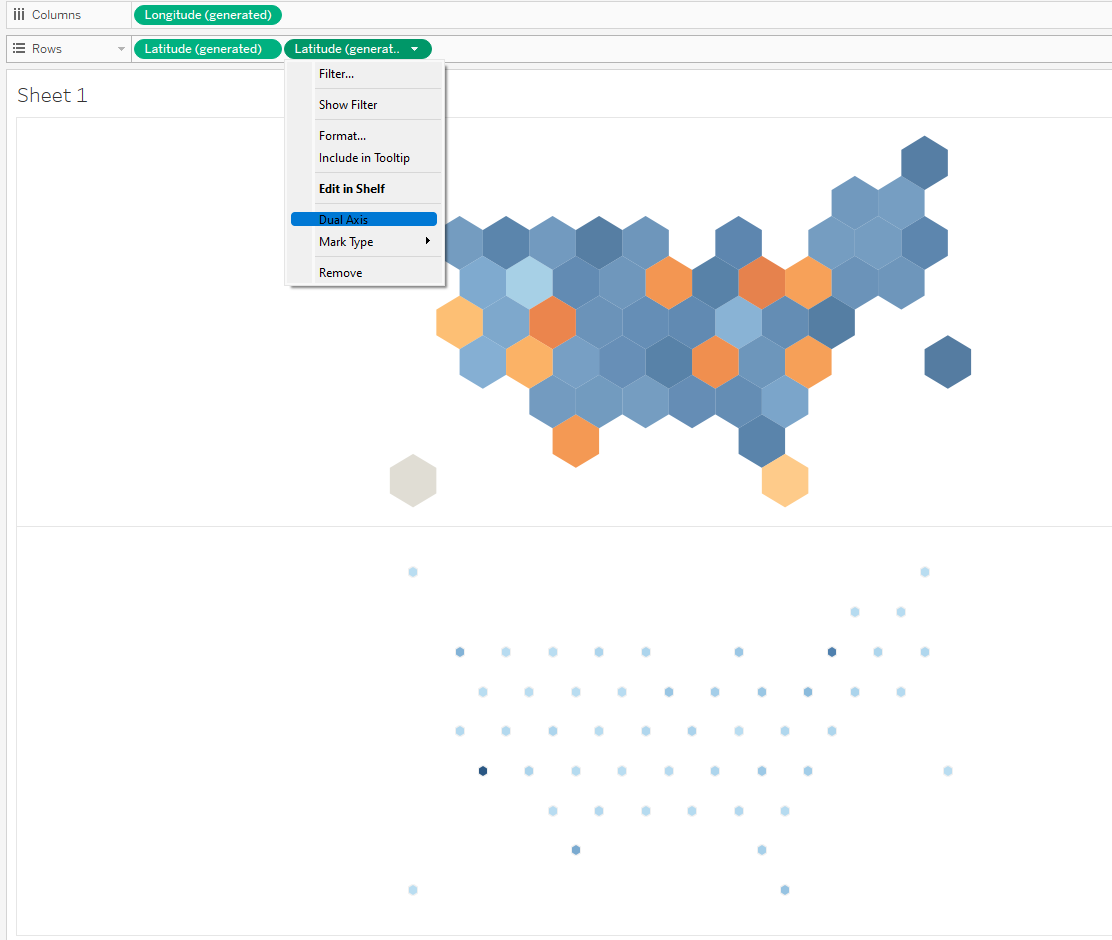
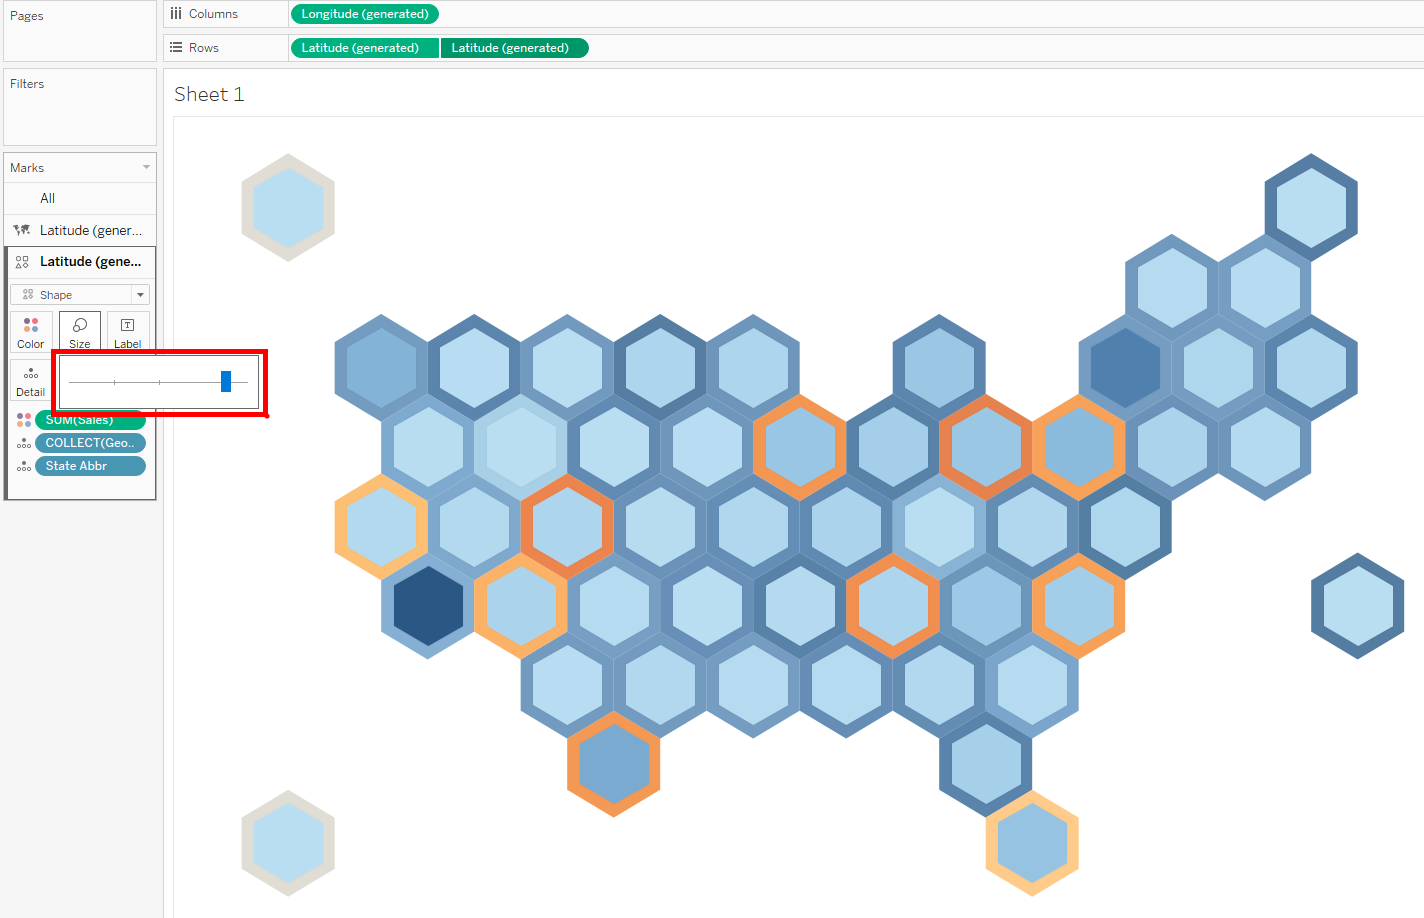
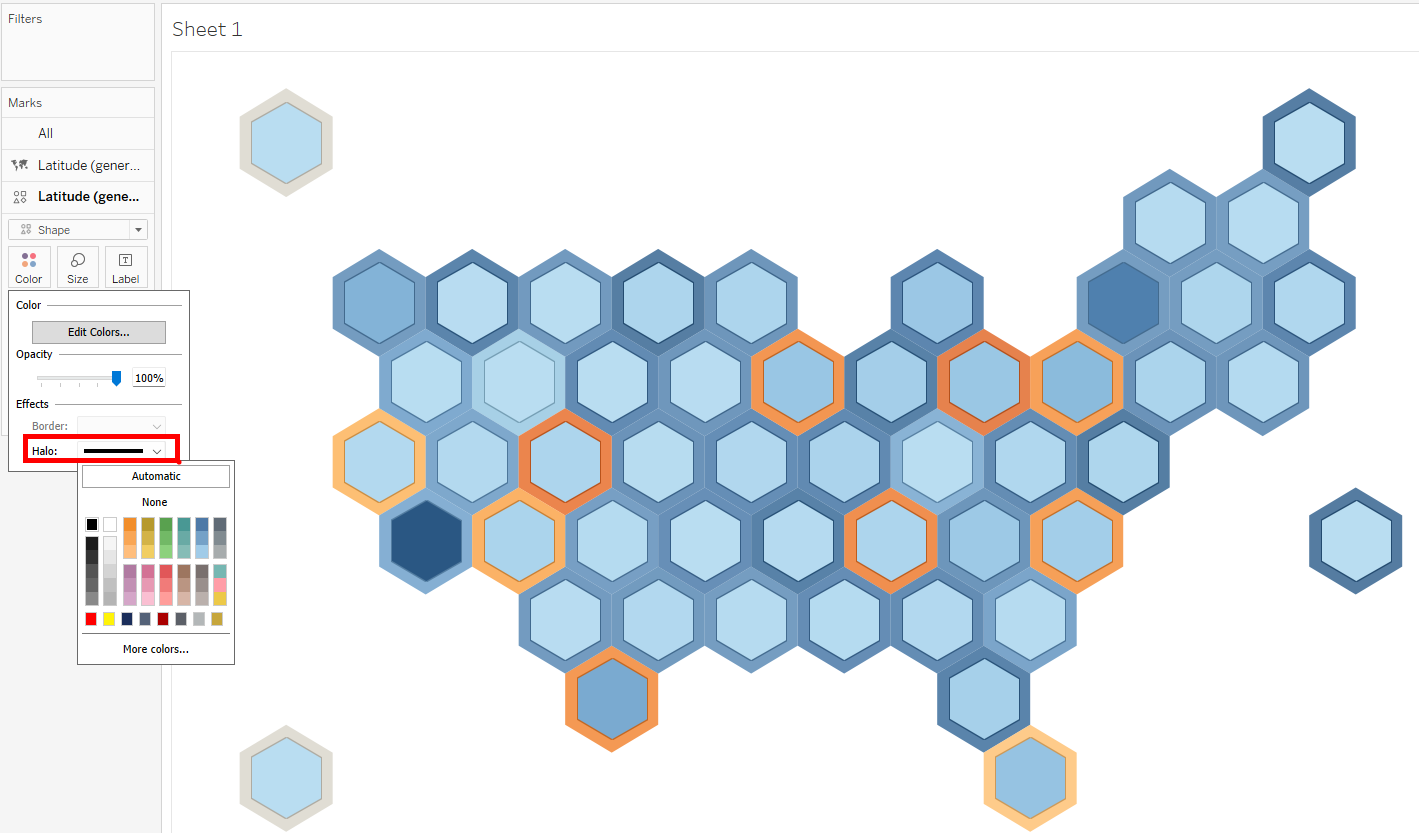
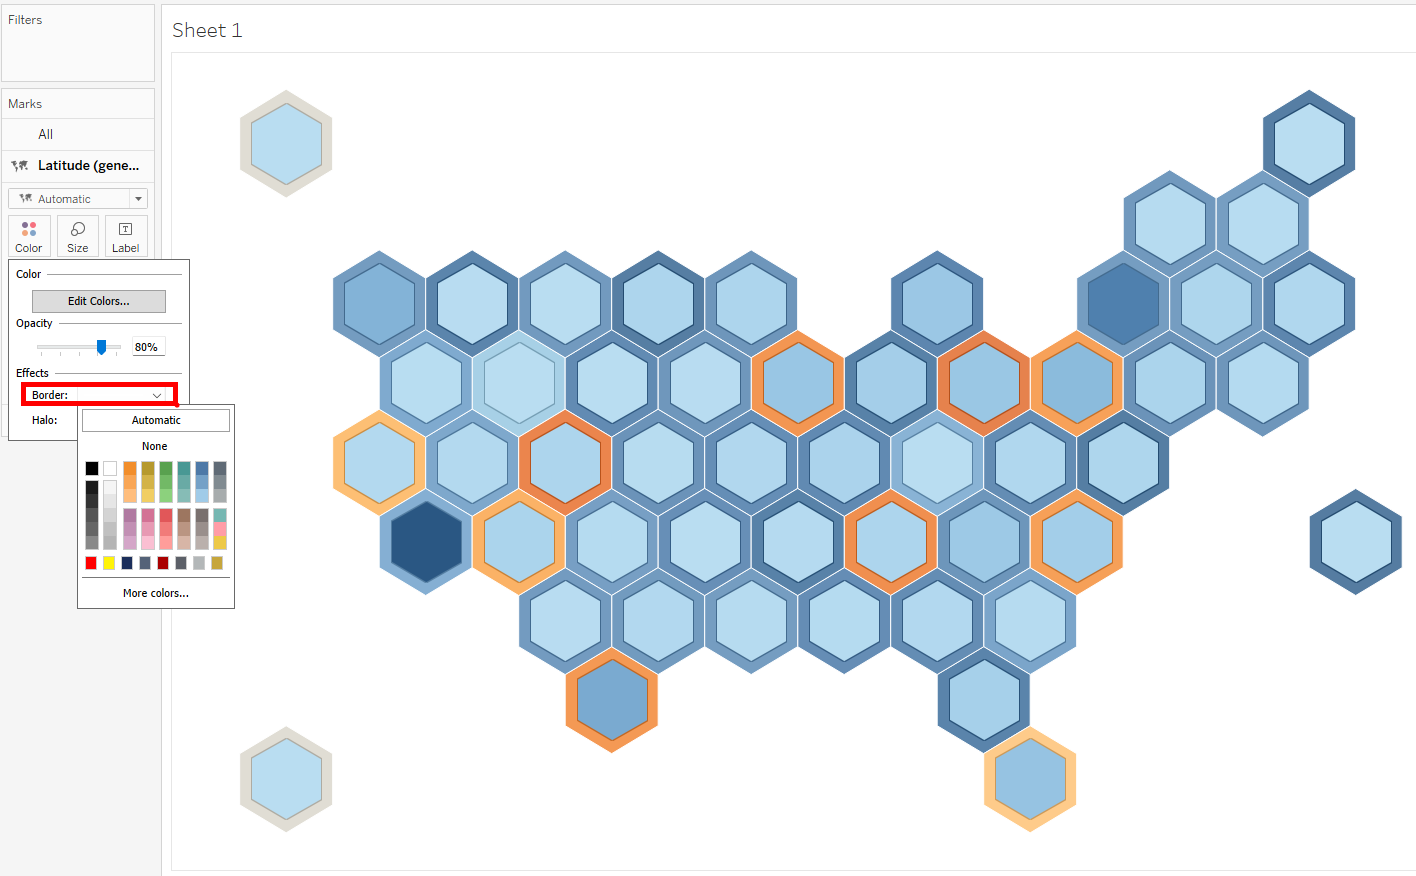
6. Create a dual axis between both maps. Resize the marks of the second map reasonable and apply a black halo. Add a white border to the first map.
7. On the first map, drag state abbr and profit ratio to the label mark.
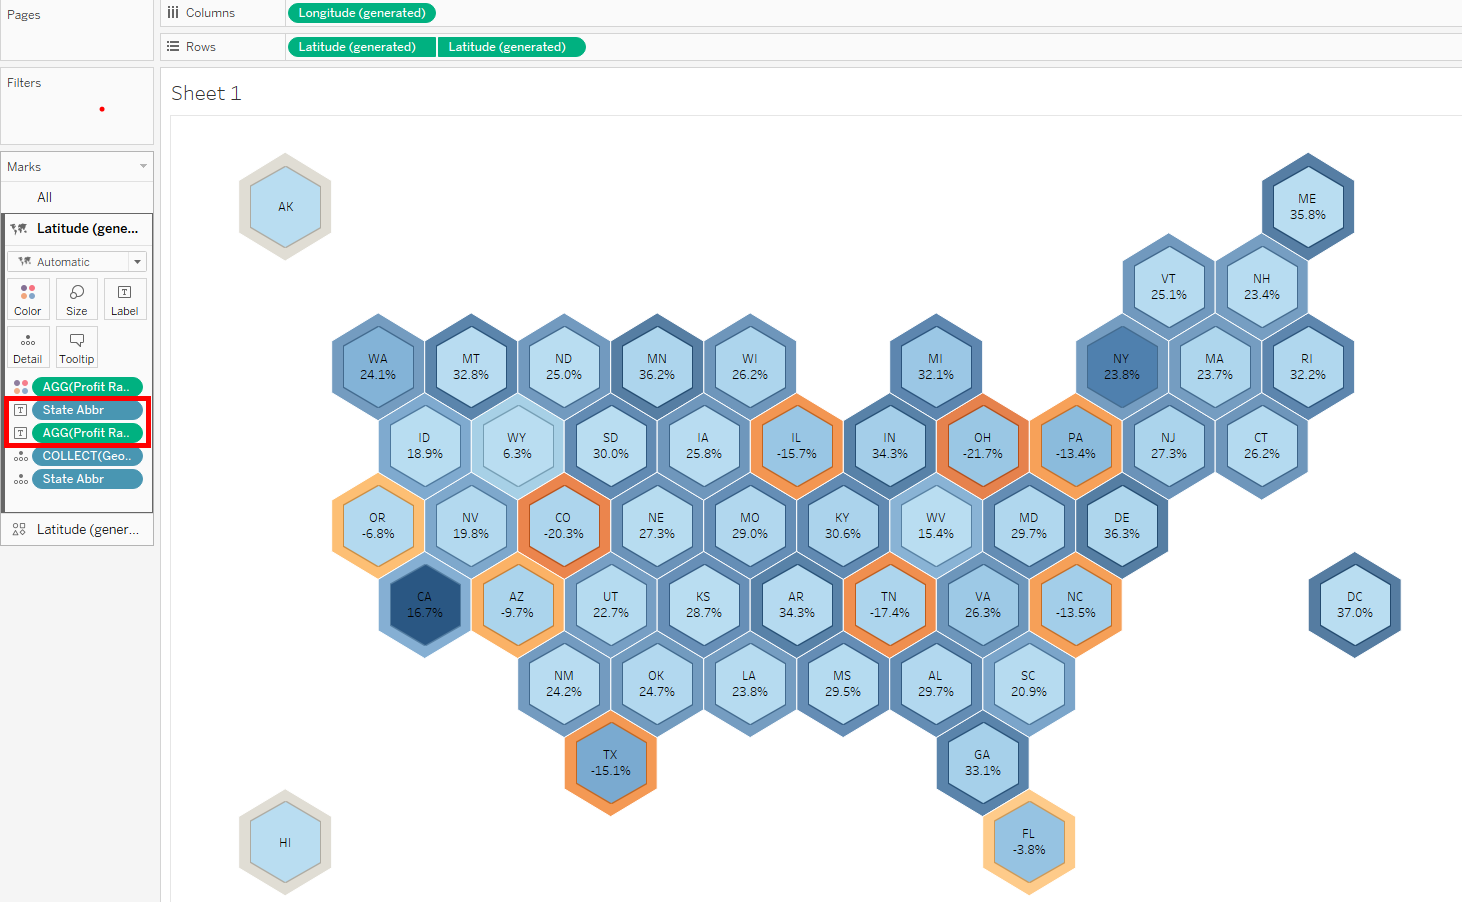
The layered hex map is complete and we can compare the profit ratio and sales of each state. I hope this was a useful tip and thanks for reading.