


When building dashboards in Tableau, we often focus on colours to highlight insights. But sometimes, what you don’t see is just as important.
There are situations where you want marks to effectively disappear, whether that’s for cleaner layouts, hiding nulls that are necessary to keep in the view for calculations, or more advanced design techniques.
Tableau does have an opacity slider, but it doesn’t quite solve every use case. The good news is that there is a workaround: adding a fully transparent colour via the Preferences file.
The Problem
If you’ve ever tried to enter a transparent hex code directly into Tableau, you’ll hit a limitation.
Tableau only accepts 6-digit hex codes, but transparency requires an 8-digit hex code (which includes an alpha channel).
The hex code for a transparent colour is #FFFFFF00. This represents a fully transparent colour. But Tableau won’t let you type this directly into the colour picker.
The Solution
To get around this, we can add the transparent colour as part of a custom colour palette inside Tableau’s Preferences.tps file. This is the same file used to define custom palettes in general.
To find this file, go to your “My Tableau Repository” folder. By default, this is located in your Documents folder on both Windows and Mac.
Inside, you will see a file called Preferences.tps. Open the file with any text editor, such as Notepad (Windows) or TextEdit (Mac).
Inside the <preferences> tags, paste this code:
<color-palette name="Transparent" type="regular">
<color>#FFFFFF00</color>
</color-palette>
Save the file, then close and reopen Tableau.
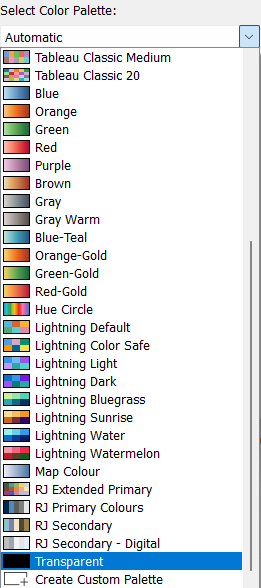
Your new transparent colour will now appear in the colour palette. To find it, open the Edit Colours window and click “Select a Colour Palette”.
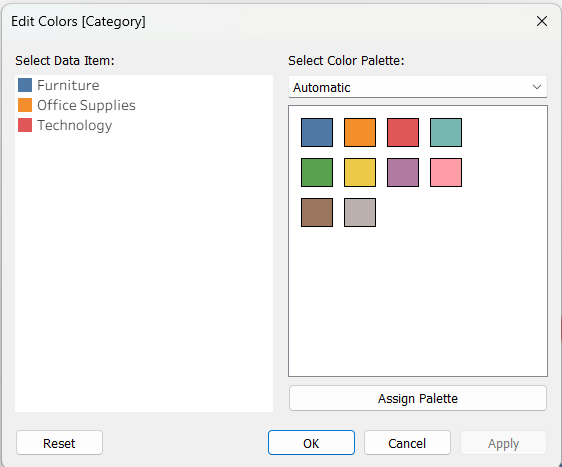
Scroll all the way to the bottom of the list and you’ll see your transparent colour. It will appear black in the palette preview, but don’t worry, it is fully transparent when applied to the view.
Now simply assign the transparent colour to the desired measure or dimension and voilà! You now have an invisible mark in your worksheet.
Using the Transparent Colour
Once added, you can:
- Hide nulls that need to remain in the view for calculations
- Hide marks dynamically
- Create cleaner layouts without extra sheets
Why Not Just Use Opacity?
You might be thinking: why not just use the opacity slider?
The key difference is that opacity affects all marks using that colour. You cannot make just one item in a legend transparent using opacity. A transparent hex allows full control at the mark level
This means you can have some marks fully visible while others are completely invisible, all within the same chart. This isn’t possible using opacity alone.
Final Thoughts
This is one of those small Tableau tricks that can make a big difference to how polished your dashboards feel.
It’s not something you’d discover naturally in the UI, but once you’ve added it to your Preferences file, you can reuse it in every project.
If you’re trying to push your dashboard design beyond the defaults, this is definitely one to keep in your toolkit.