You can do more than simply output to a csv using Alteryx.
There are many file types you can export to, in this blog, I will focus on csv or excel.
Let us start with csv:
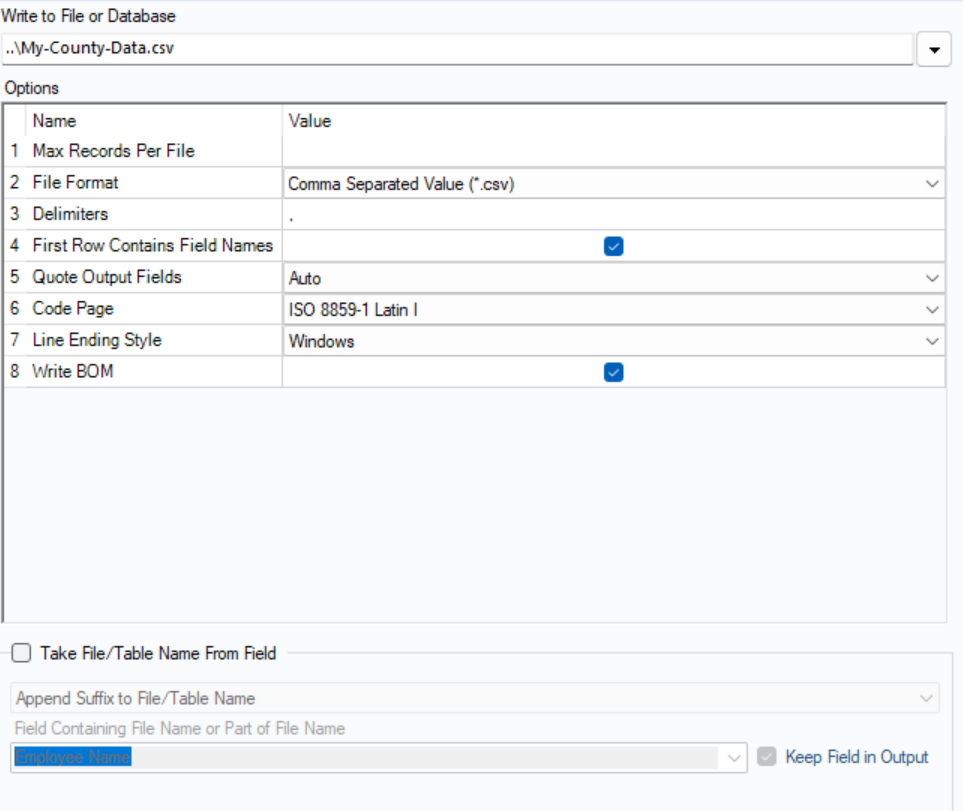
When exporting to a csv, you simply pull in your ‘Output Data’ tool and use the downward facing arrow ▼, in order to browse through your files and decide where you want to save the data. After that you can pick your file format. For this example, choose ‘Comma Separated Value’.
Now that you are set up, there are some interesting things you can do.
- Make the file path relative. This means that, wherever your alteryx file is saved, the newly created csv will be saved either on the same file path or however may files up from it you would like. For example, lets say, you have a file path (yourname\documents\datascience\alteryx.yxmd) were you have saved your alteryx workflow in the ‘datascience’ folder called alteryx.yxmd. Then when you use '.datafile.csv', your csv saves as the file path (yourname\documents\datascience\datafile.csv). Whereas if you were to use ..datafile.csv your csv saves as (yourname\documents\ datafile.csv). As you can see, the more fullstops (‘.’), the further up the file path your csv saves.
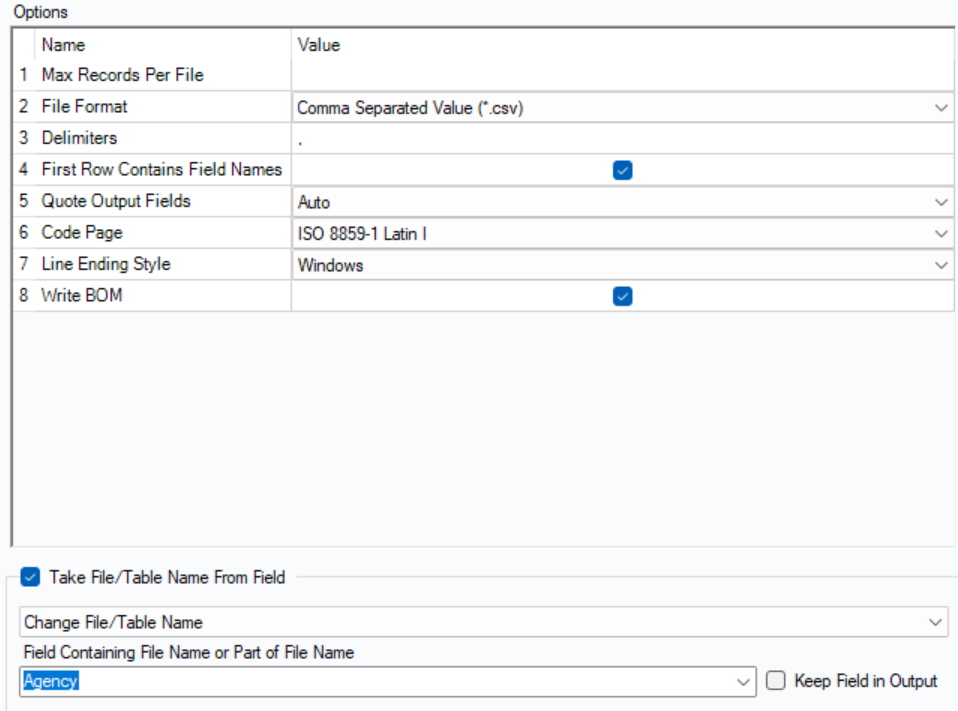
- You can also choose to save your data as separate files, dependent on a certain column's values. In order to do this, select ‘Take File/Table Name From Field’ by pressing the square on the left hand side. After that, use the drop down menu to pick ‘Change File/Table Name’ and then the one below to pick which field (which column name’s values) you want to name your csvs.
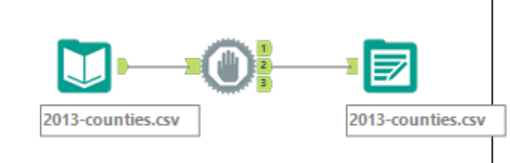
- We can also use the ‘block until done’ tool to make changes to a csv directly, without saving it to another csv first.
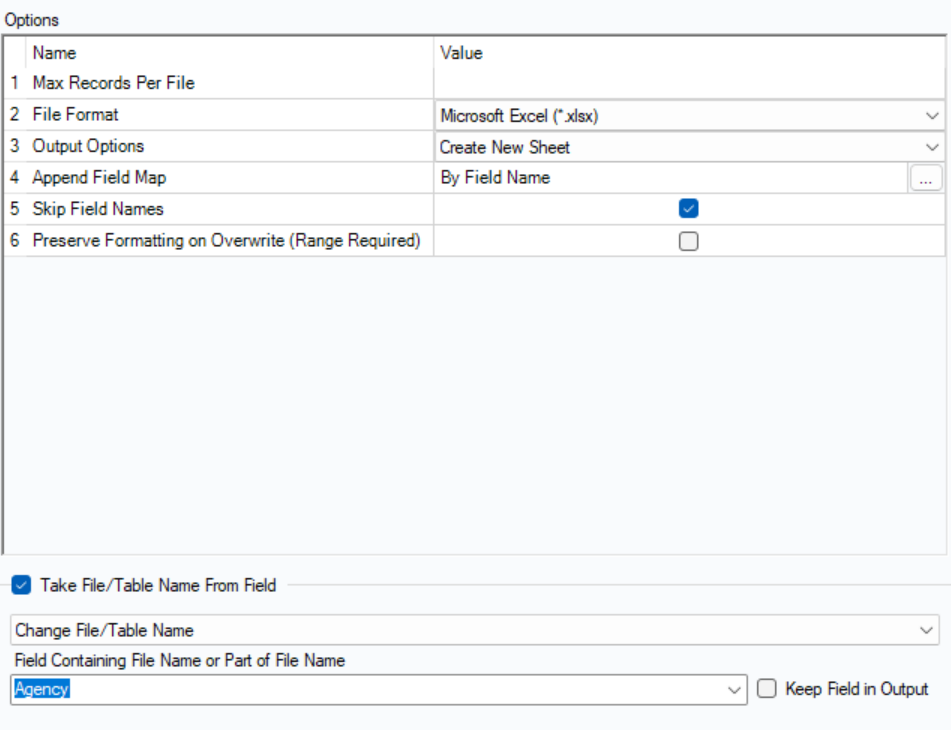
Start again, picking ‘Microsoft Excel’ for your file format.
One thing you can do differently in excel to csv, is being able to save your output data as different sheets rather than different files.
- So, after picking your file format, change the ‘Output Options’ to ‘Create New Sheet’, then once again, select ‘Take File/Table Name From Field’, ‘Change File/Table Name’ and finally the column you want to separate your sheets by.
Thank you for reading!
