


SQL Server Integration Services (SSIS) is a powerful ELT tool. It's ease of integration within the Microsoft Data stack allows for high-performance data integration and workflow solution building.
A simple but important step in learning how to use the tool is figuring out how to obtain data from a source and push it to a destination for example our SQL Server. In our case we use Visual Studio to interact with SSIS as an extension.
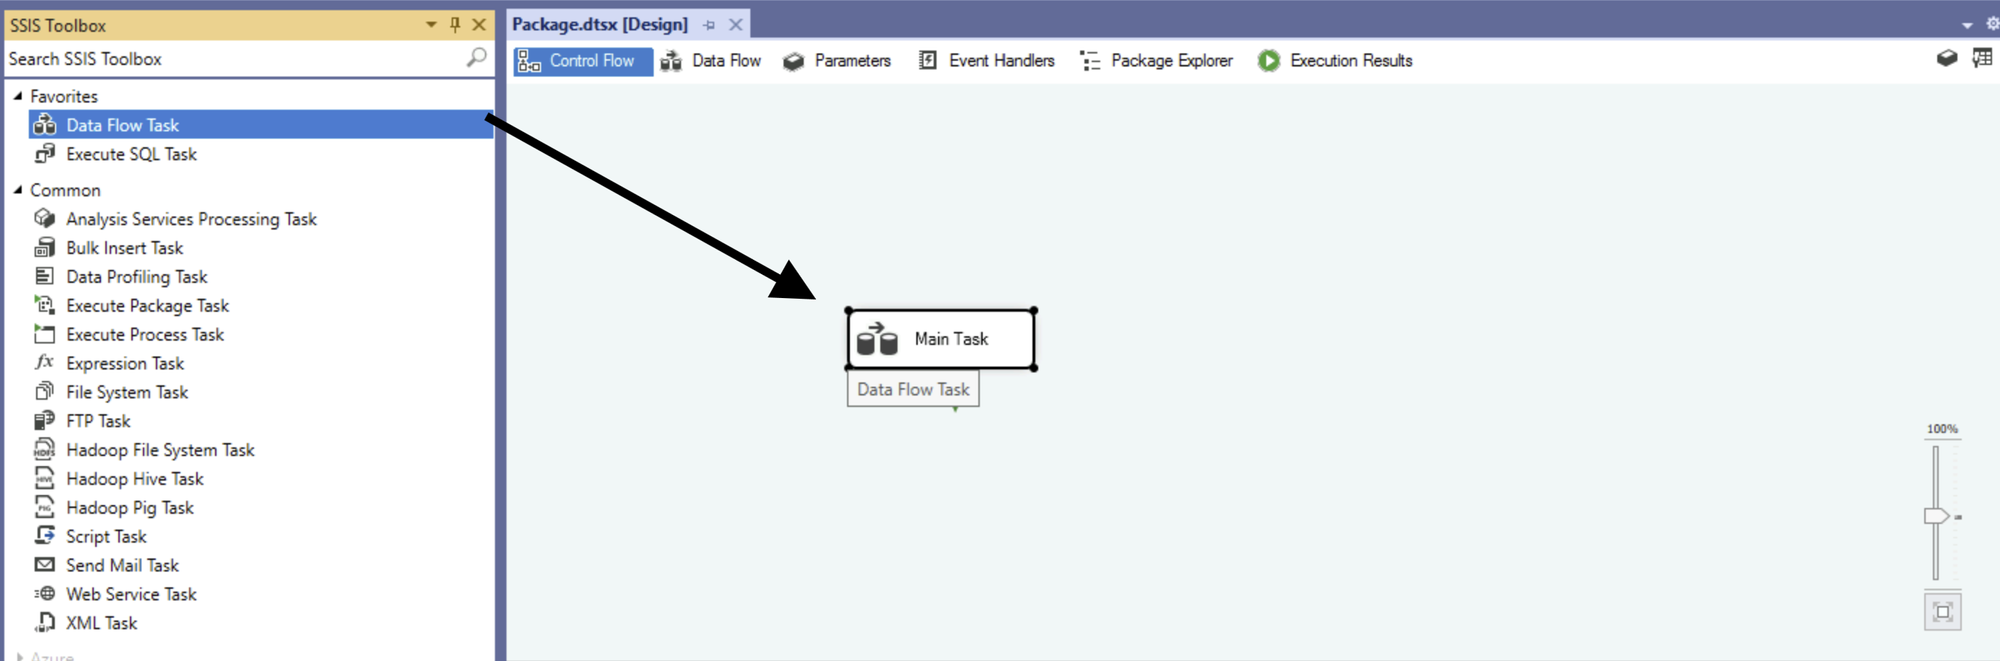
The first step is to create a solution, this will include a package file, you can see it in the Solution Explorer, by default on the right side of your Visual Studio Interface. You'll see there's a canvas and on the left pane a tool box, to start your workflow you need to add a data flow task to the canvas with a simple drag and drop.
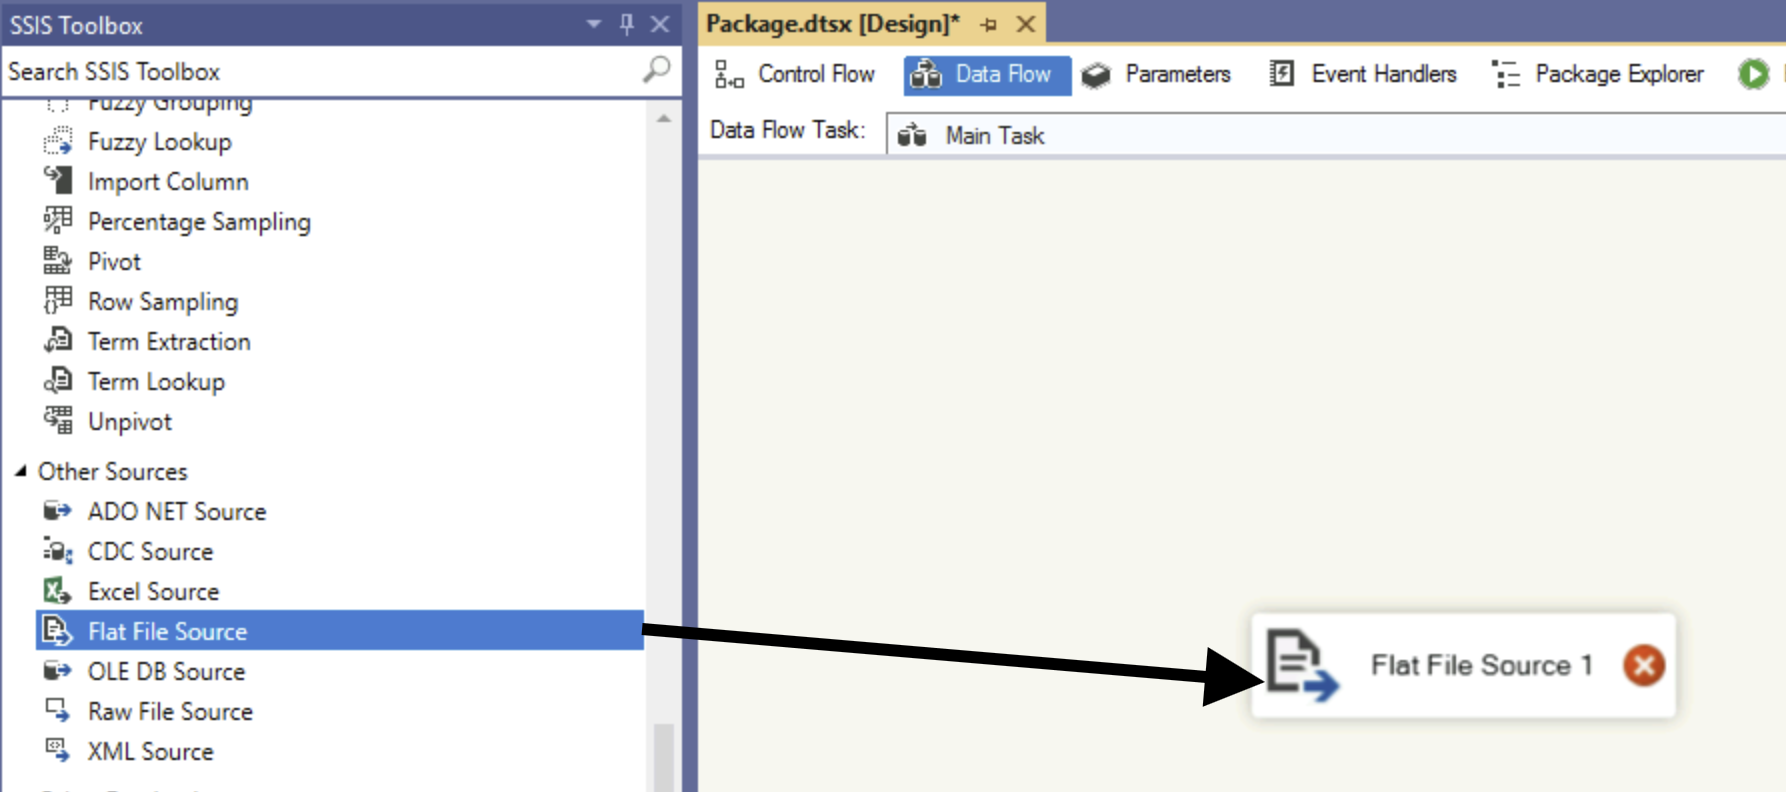
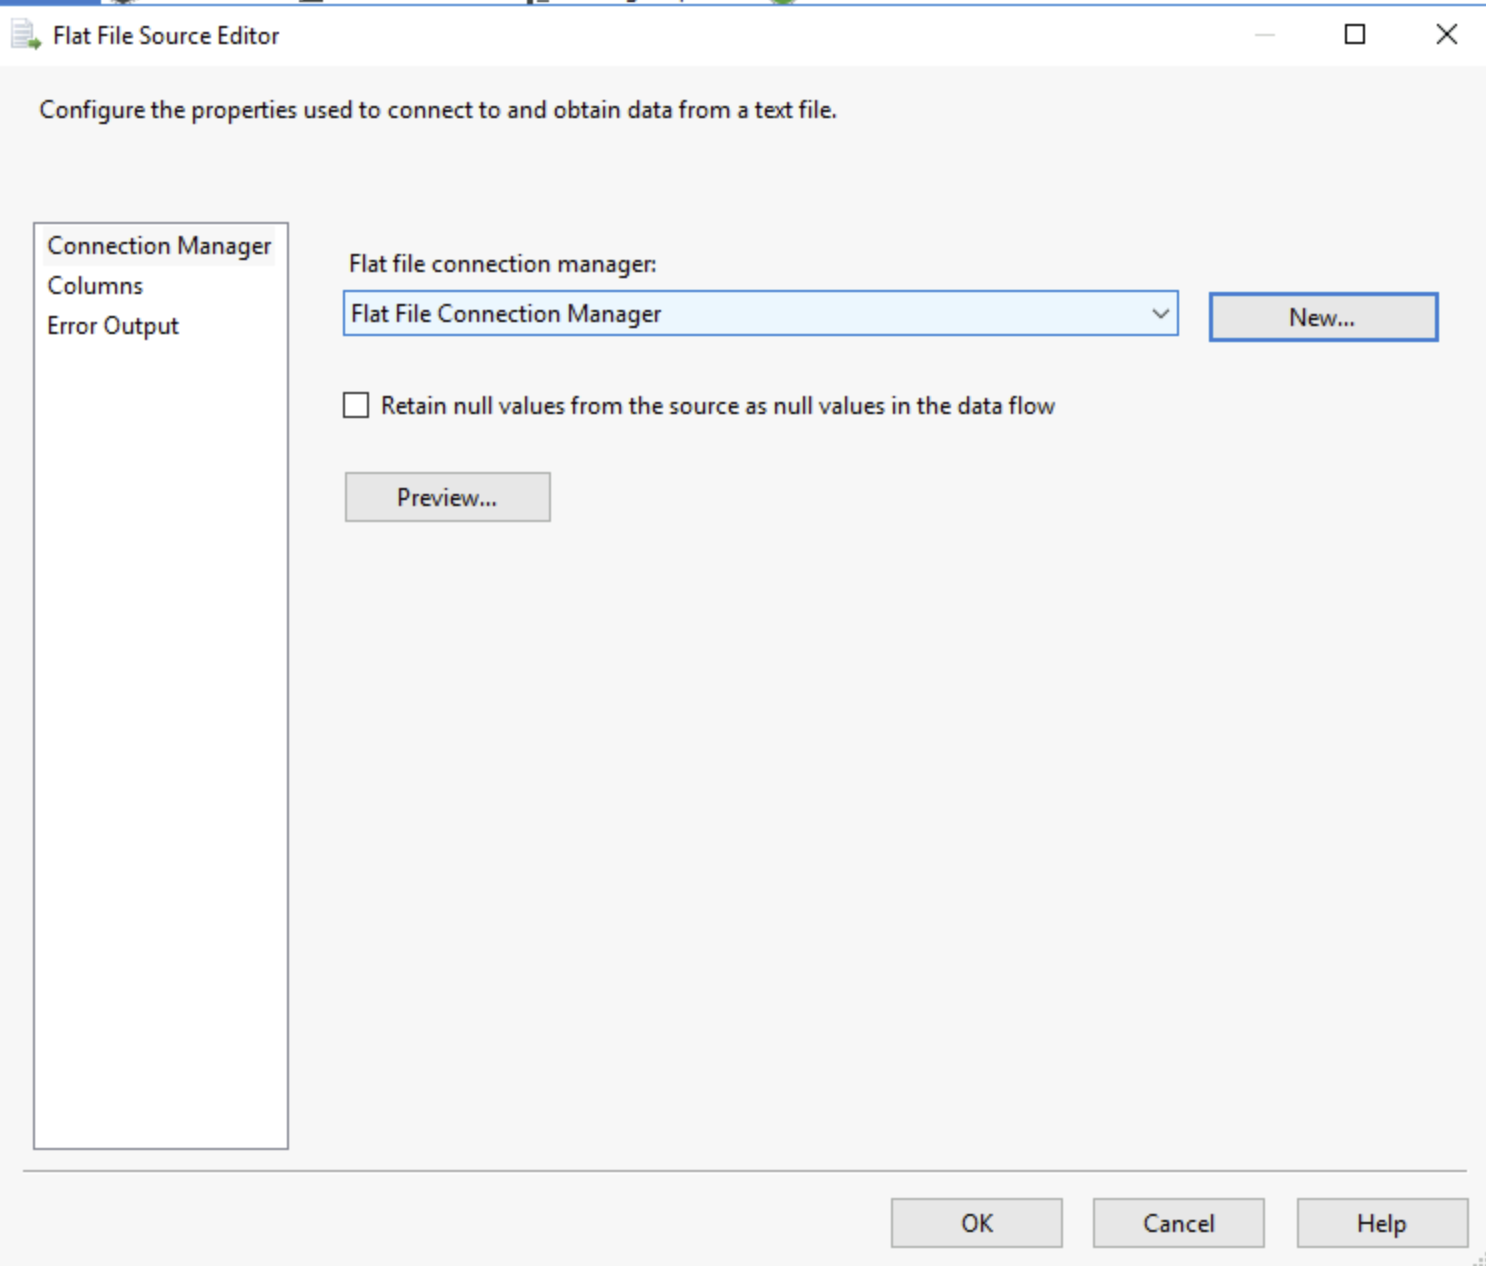
If you double click on the Data Flow task you can enter it, a similar canvas is visible with another toolbox on the left. We'll want to start with a source, in our case a flat file source to load our CSV. You can drag and dorp the flat file source tool in your canvas and double click it to edit it and set the connection to your CSV.
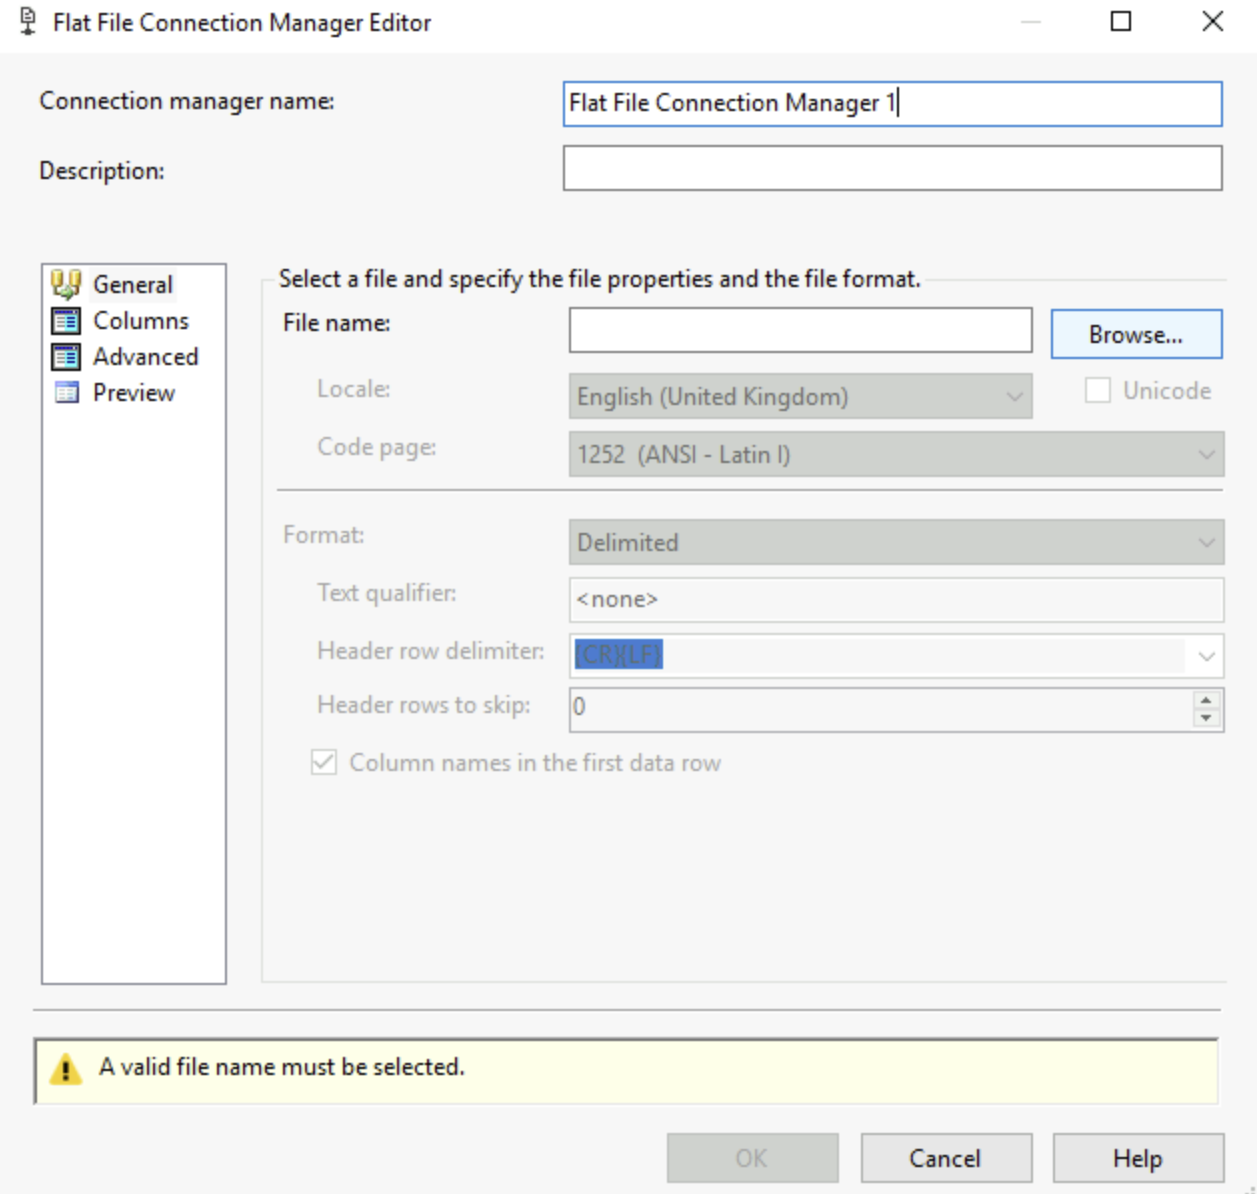
You will see a new window appear with a Flat file connection manager, you can select new to find your new CSV. This gets you into the flat file connection manager editor, you then look for your file and can edit the columns and go through some advanced prep, this is especially useful to verify that you are pulling the right columns and are using the right delimiter.
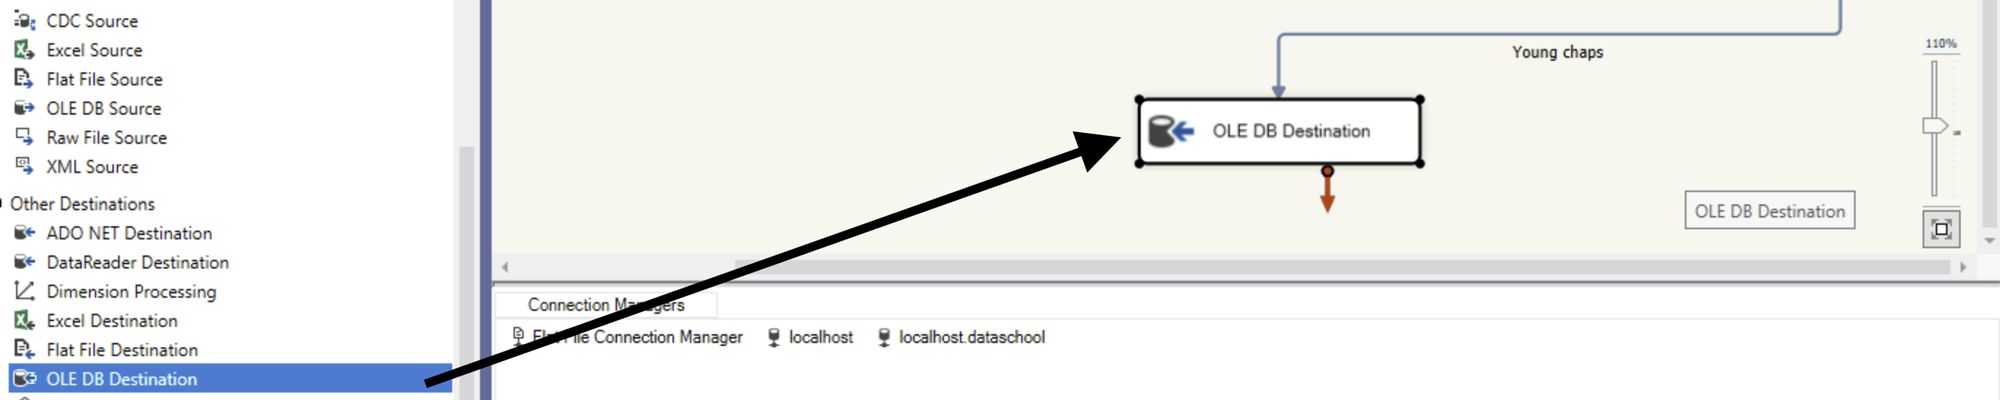
You can add steps to perform transformation, we will cover some of those in a later blog. Our main and most important step now it to output the data into the right destination. I've purposefully created a table in the SQL Server to insert our data into. We're going to use an old DB destination, again we can just drag an drop it from our toolbox! Double click it to set it up!
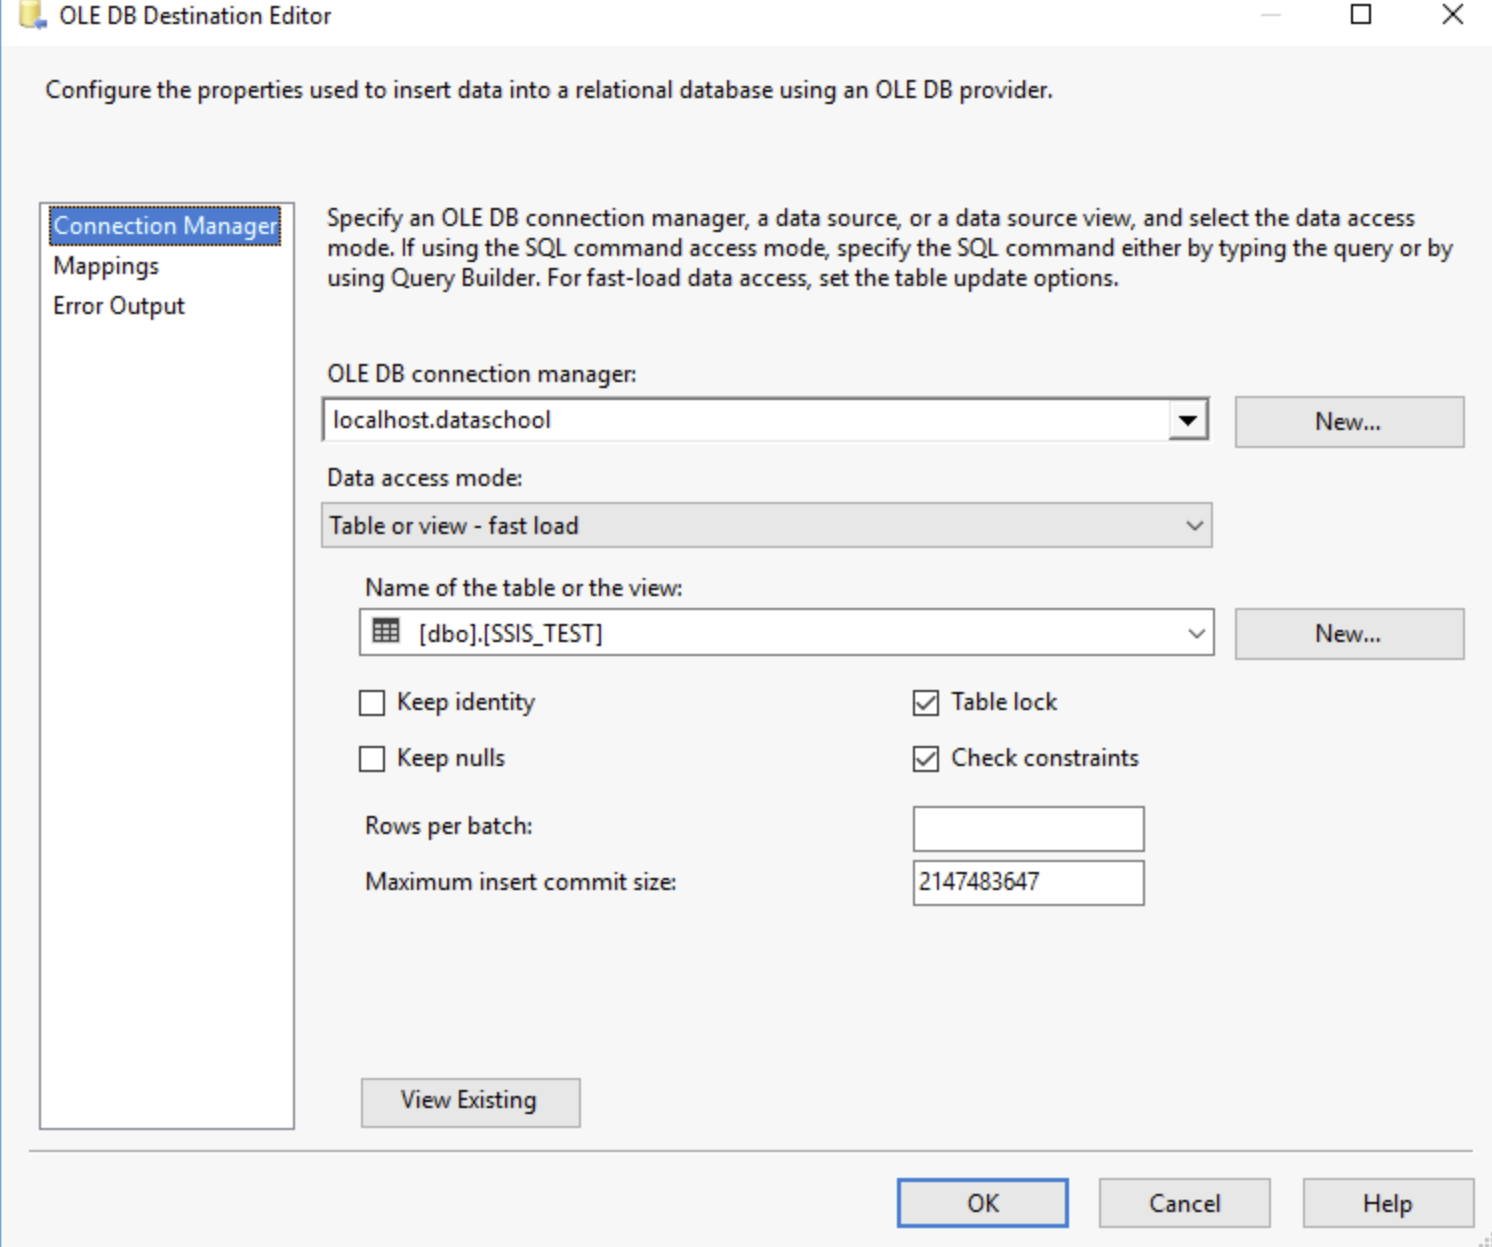
This opens the Old DB Destination editor, in Old DB connection manager, add a new server using its address, port and more. In our case we have a local server so it's just locahost. You can then select in data ccess mode where you want, since we created a table for us it's Table or View - Fast load. You then get a drop down allowing you to choose the name of the table or view you want to insert your values in. It's important to remember that the data will be inserted and not refreshed!!!
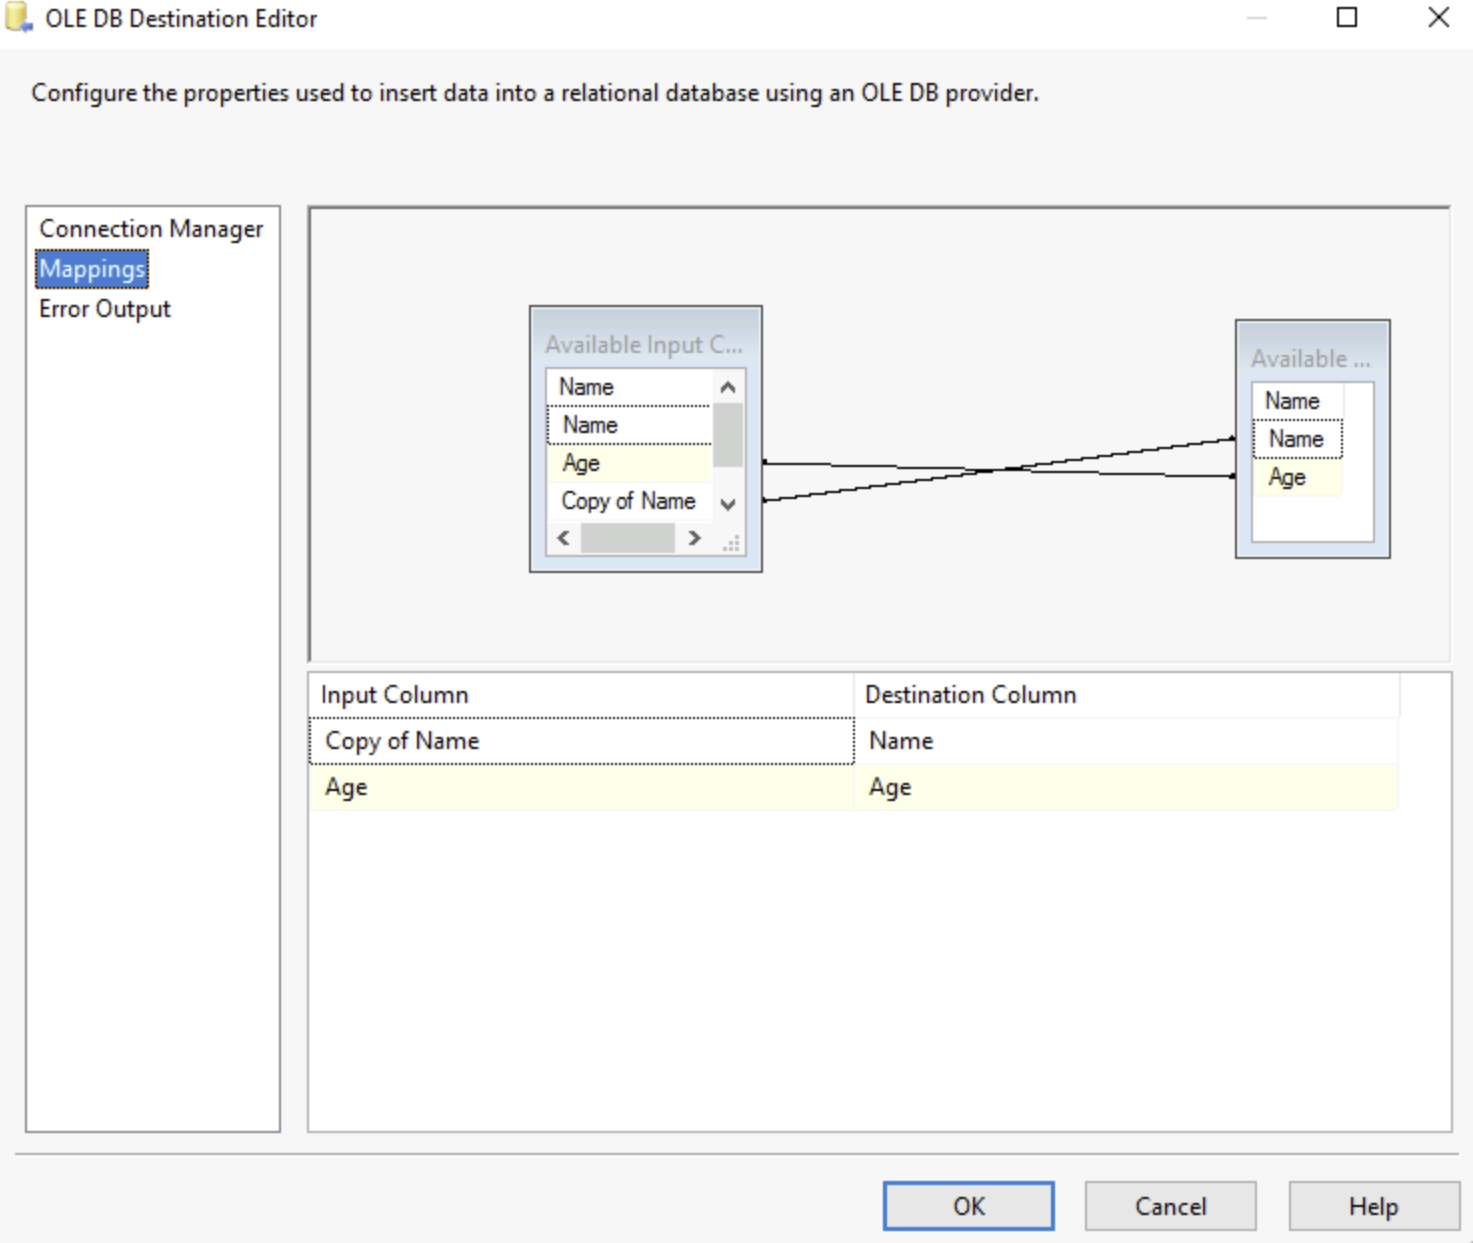
You then need to use the mappings tab to assign the columns from your SSIS data after transformations to the equivalent column in the SQL server table:
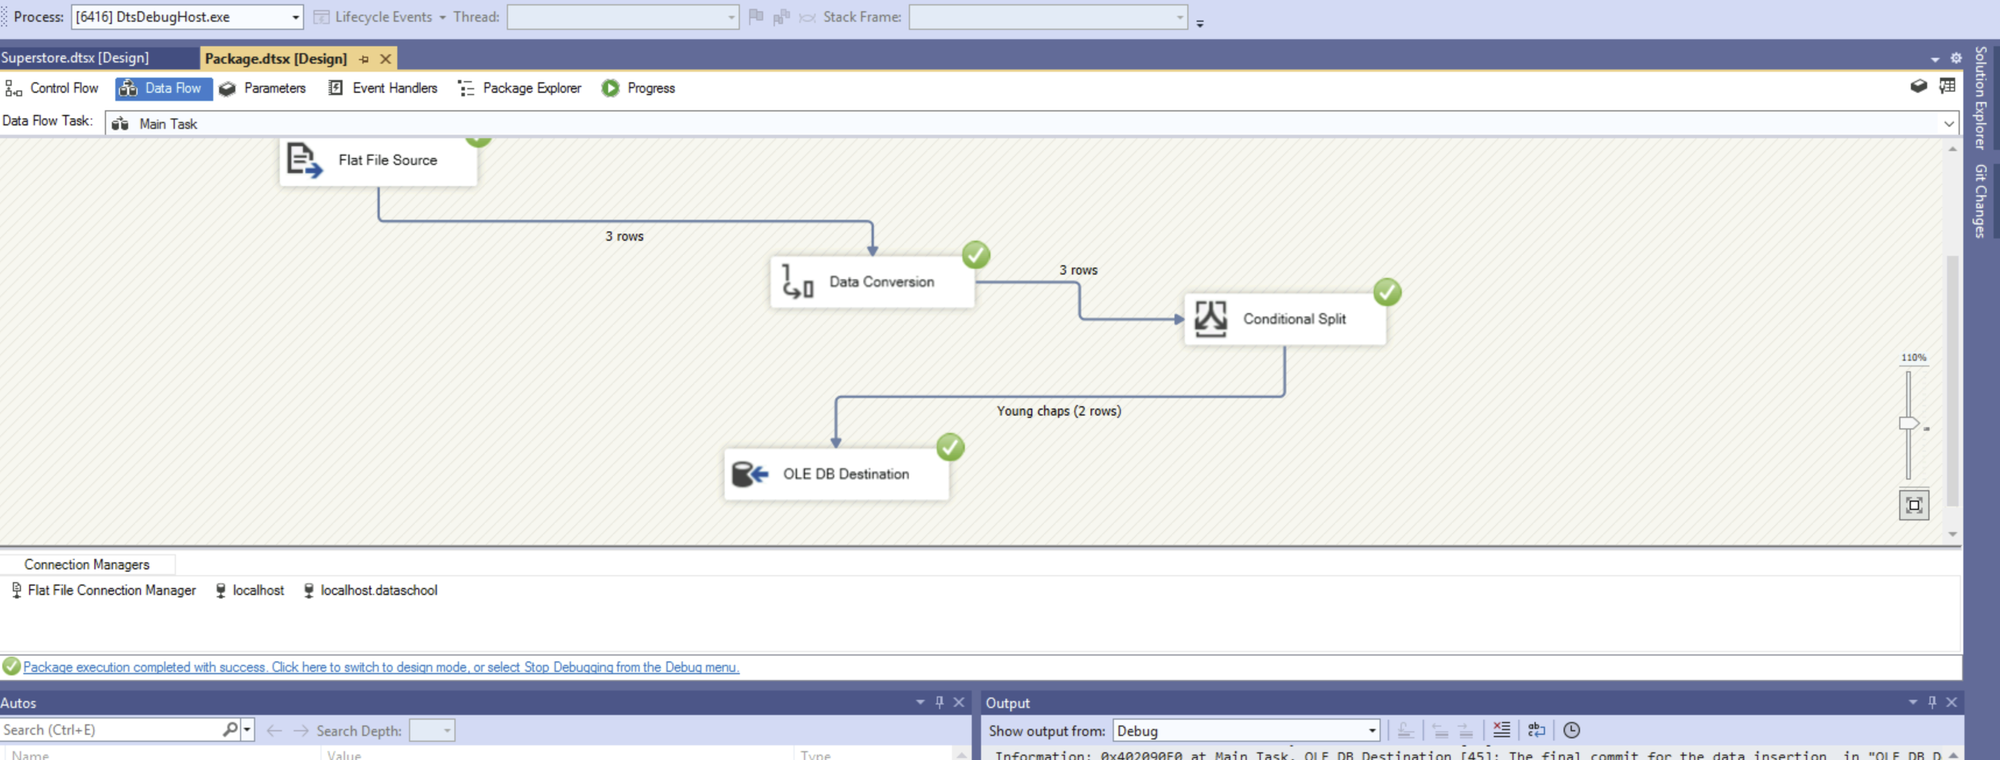
Once this is done all that is left to do is press the Green Run button or F5 as a shortcut, this will run the flow and lead you to the debug view. This view allows you to see if any errors come up in your flow.
Once that's done, you'll see that your data has been inserted in your table!
We will learn next time how to add transformation steps, error handling, and git integration.