


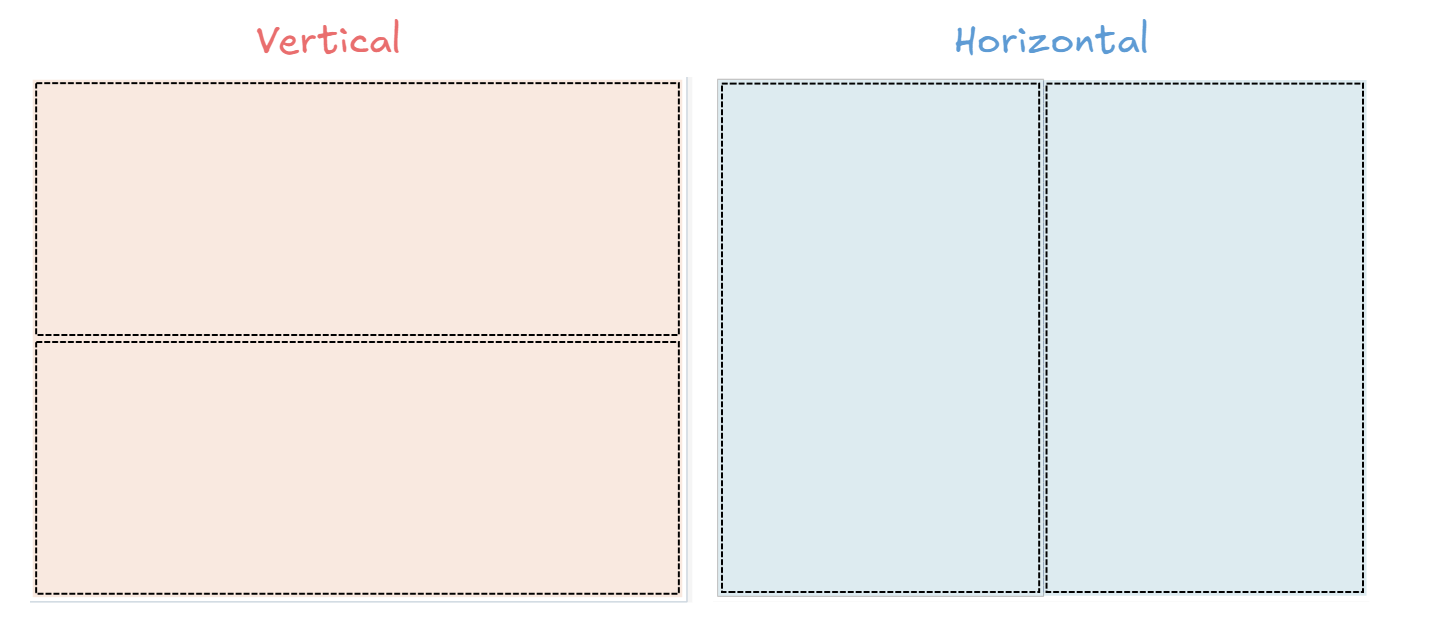
In Tableau, containers are dashboard objects that allow you to structure and organise your visualisations. They do this by grouping dashboard elements in one of two directions:
Tip 1) Think from large to small
When sketching the layout of your dashboard it is important to consider how sections are going to be split. A good approach to take is to start with the larger sections and then work your way down towards smaller sections.

Above is an example of how the larger sections of the dashboard are structures using only one horizontal and two vertical containers.
Tip 2) Keep track of your containers
Keep track of your containers as it very easy to suddenly have duplicate containers that serve no purpose (these tend to appear when adding in charts with filters and colour legends etc.). When sketching a layout of your dashboard take note of how many vertical and horizontal containers you should end up with.
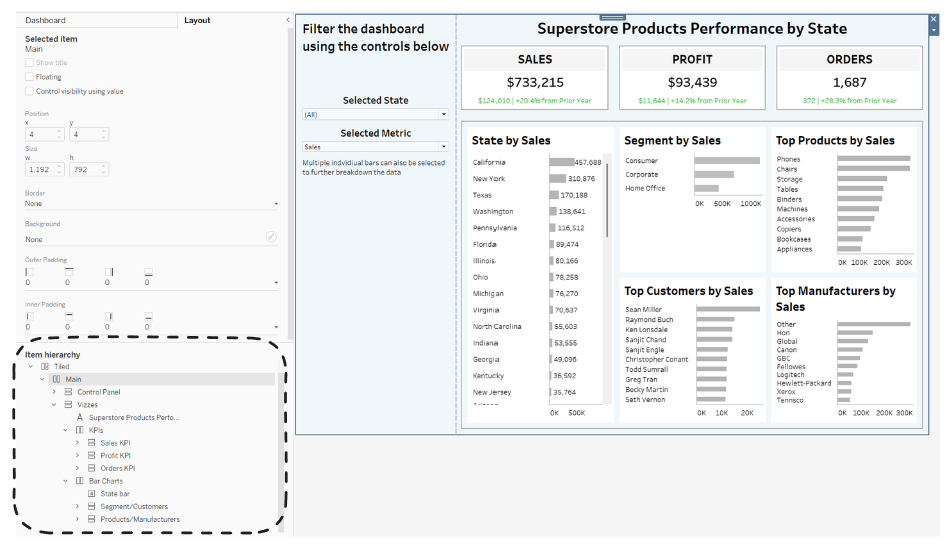
Labelling your containers in the Item Hierarchy section of the Layout tab is a very useful way to stay on top of your containers know which one you are interacting with.
Tip 3) Use Blanks every time you place a container
It can sometimes be tricky to place containers within containers in the correct way To help with this we would use a Blank object. However, often Tableau will shrink the space to how much it thinks the container needs (which is not a lot).
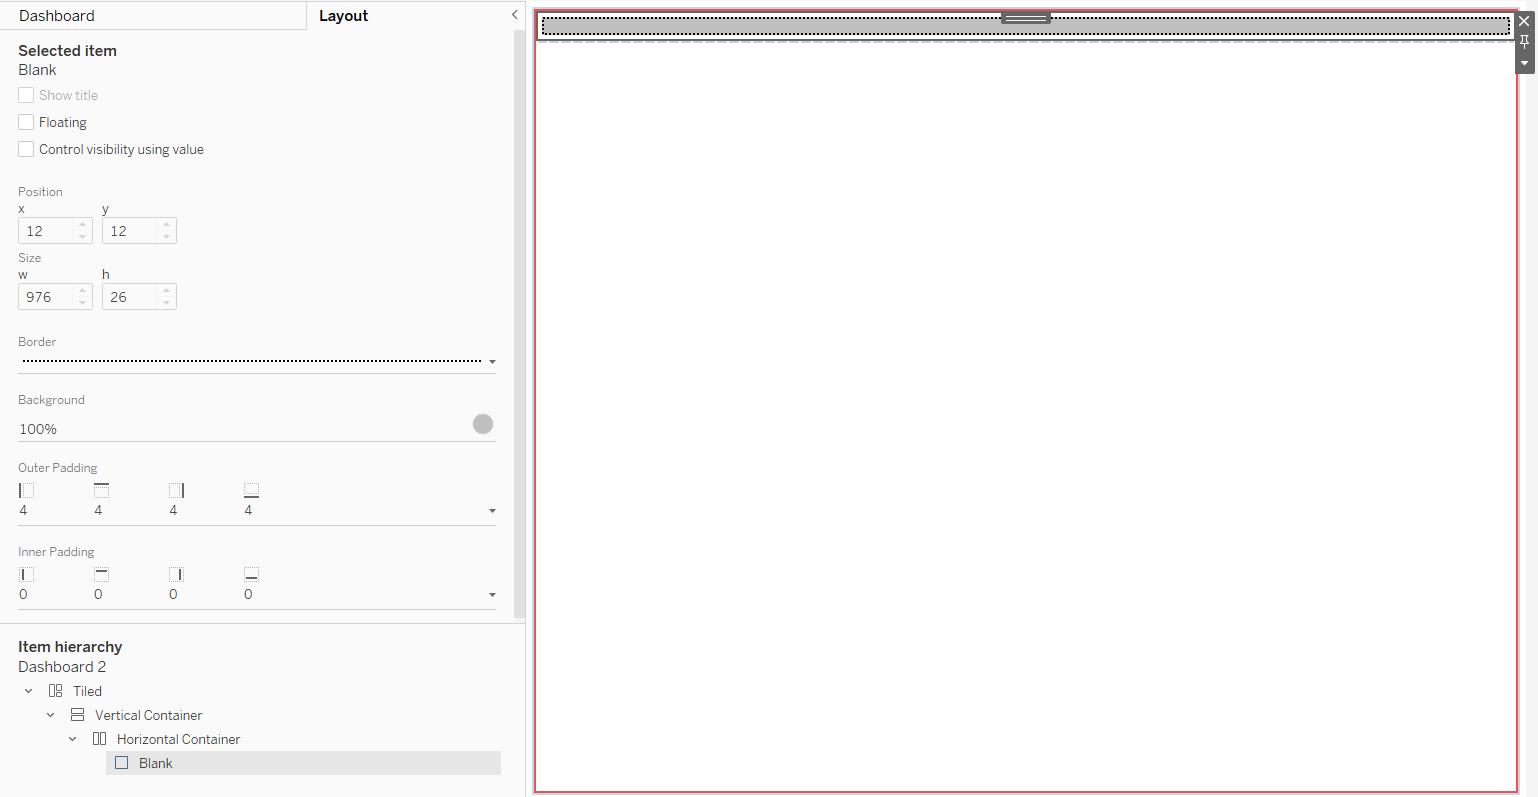
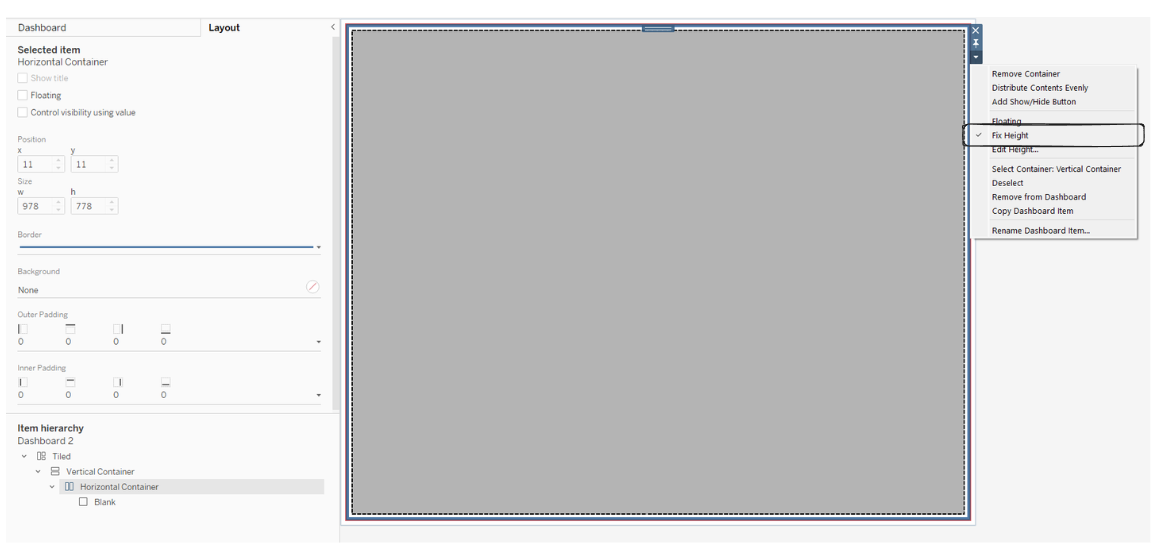
As you can see when I place the grey Blank object Tableau shrinks the object and container. To fix this, we click on the pin button to fix the width/height of the container before placing the Blank object which will result in the outcome below.
It is very tempting to use floating containers, which allow you to place containers wherever you want, but this normally results in dashboards that do not adapt well to different screen resolutions.
Once you get the hang of it, vertical and horizontal containers are an effective tool to create a well structured dashboard fit for any purpose.