


The end-to-end pipeline in Tableau Next is very similar to the ones you might find in Tableau Server and Tableau Cloud. Almost every step of the process has an analog:

The only missing piece here is a comparison for a data model object, which confused me during the beginning of my Tableau Next exploration. Do we really need another step between tables and data modelling?
In actuality, we do not need this intermediate step, but it provides critical future proofing to help keep data pipelines functional in the long run.
To understand their value a bit more, let's walk through the process of building out our first DMO, which will happen in the Salesforce application Data Cloud. Once you are in Data Cloud, navigate to the Data Lake Objects tab:
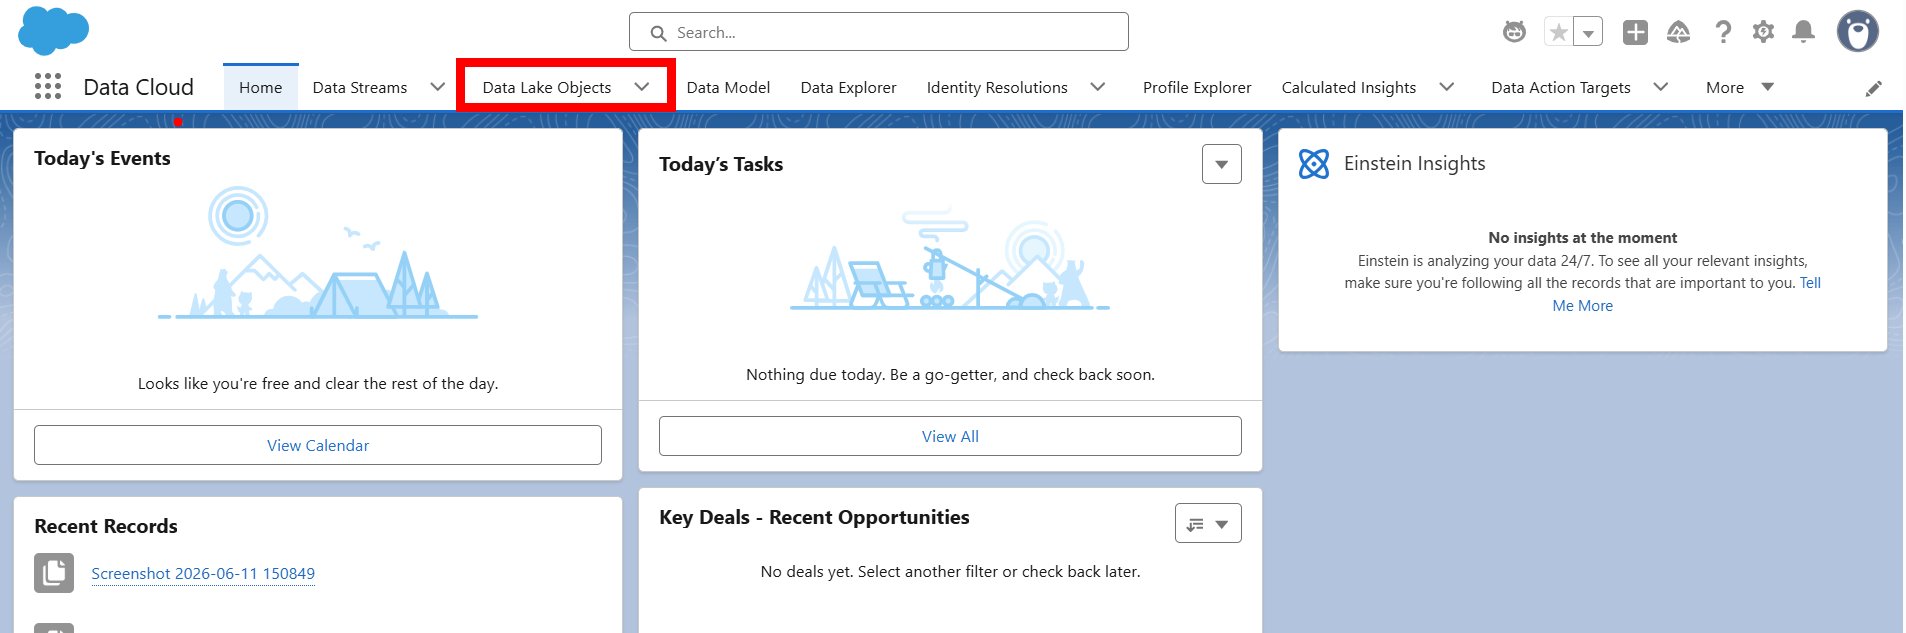
Once there, you will find the list of Data Lake Objects available in your workspace, which you can bring in as flat files (.csv files), through database connections, or through data streams, set up in the tab to the left. Here is what my environment looks like:

I am going to choose my Broadway Fact Table (fact_table_Broadway) to be the guide for this new data model by clicking on it and opening it:
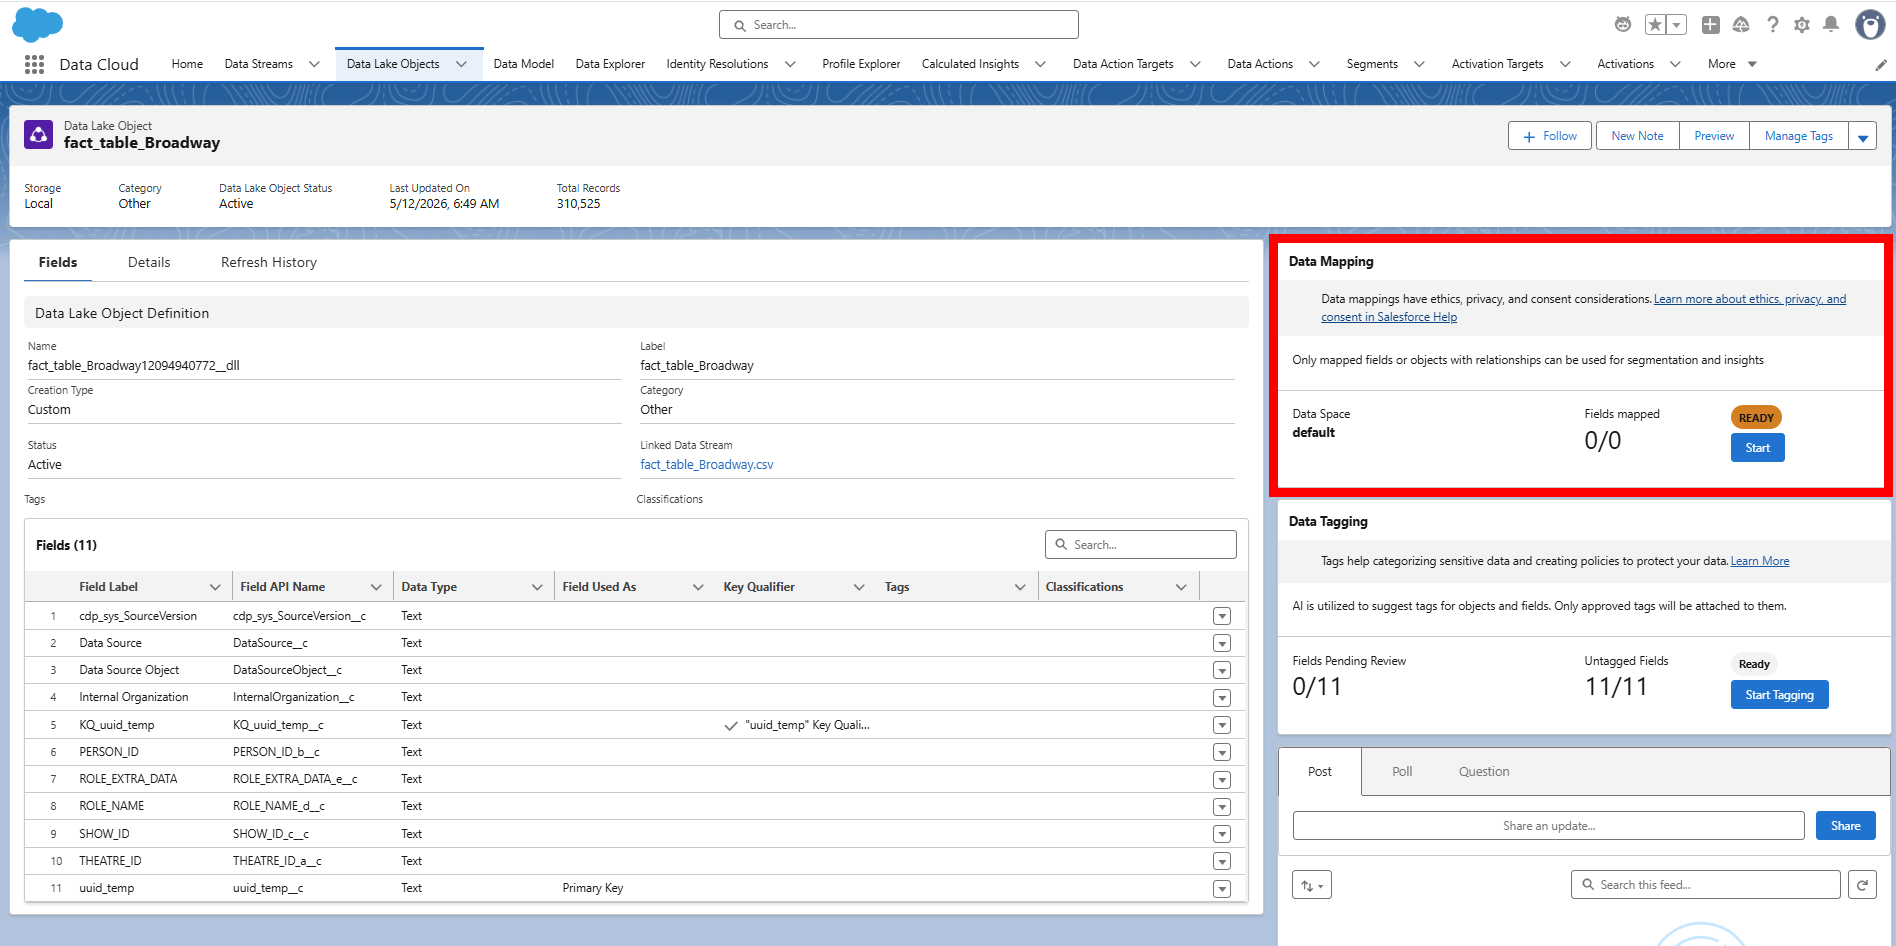
The Data Mapping menu is the key to DMO creation. Clicking start brings us to the following screen where a Data Lake object on the left is ready to be mapped to a new Data Model Object on the right:
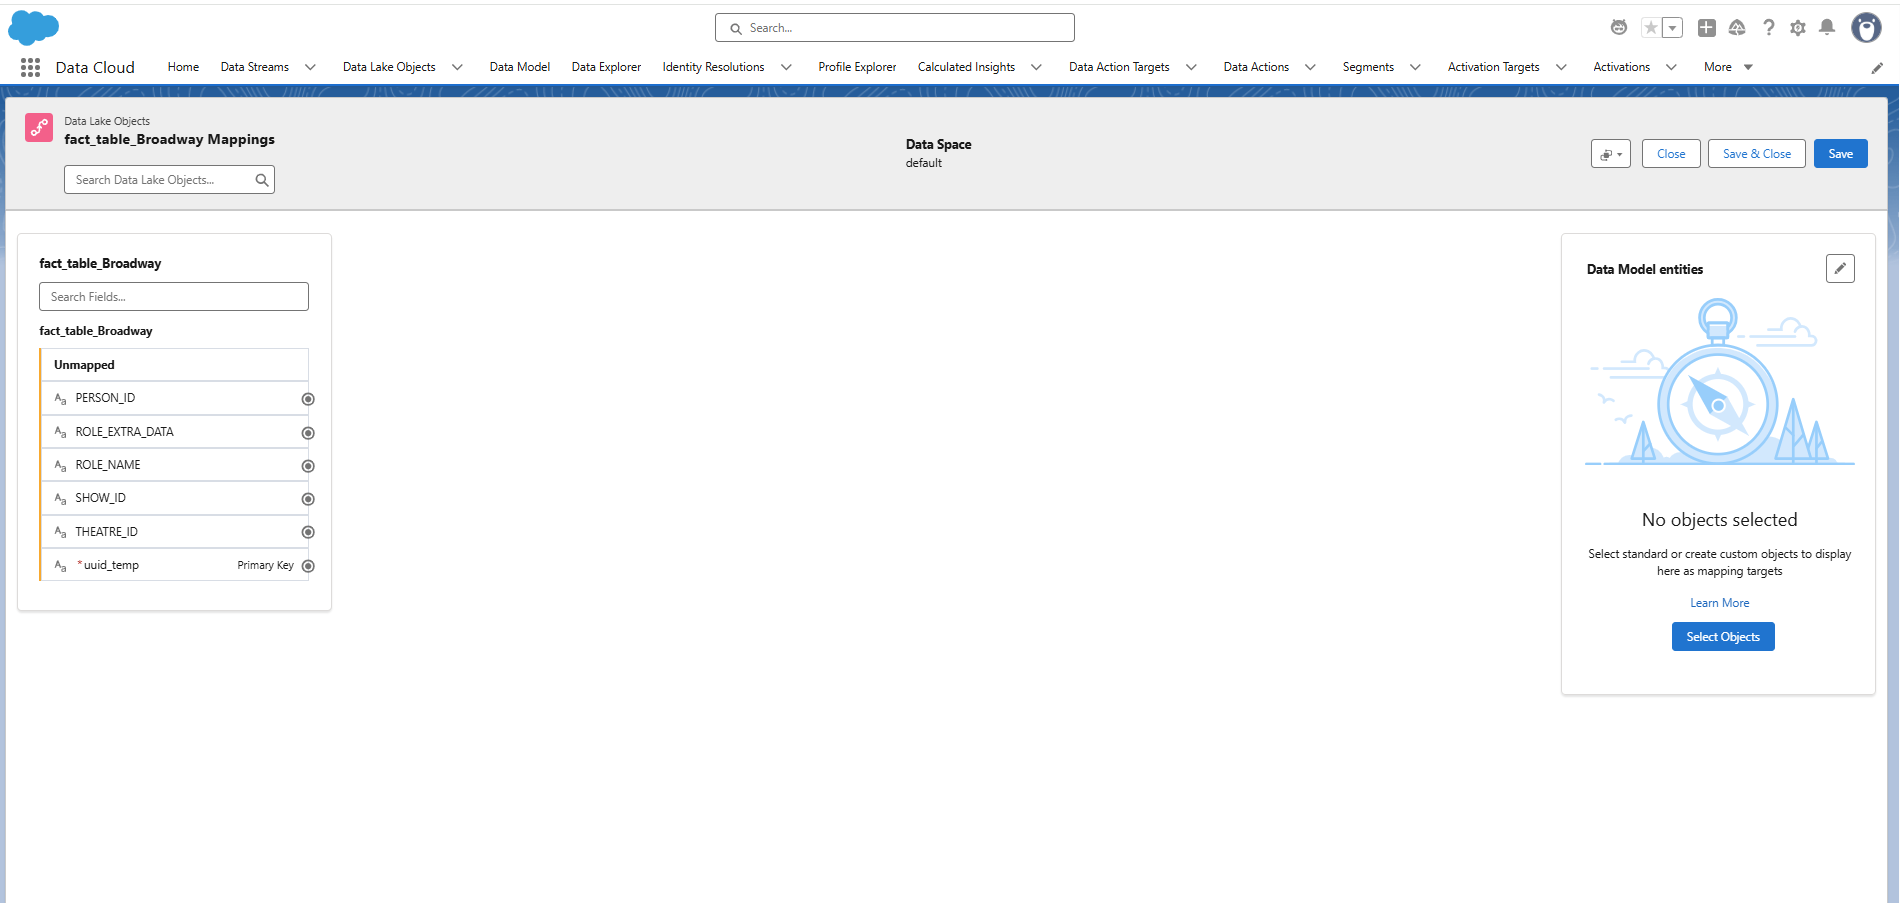
Clicking "Select Objects" (and waiting a bit) opens an interface to select how to design your DMO. You can choose one of the standard ones prepared for typical business circumstances, but in my experience I most often opt for a custom data model.
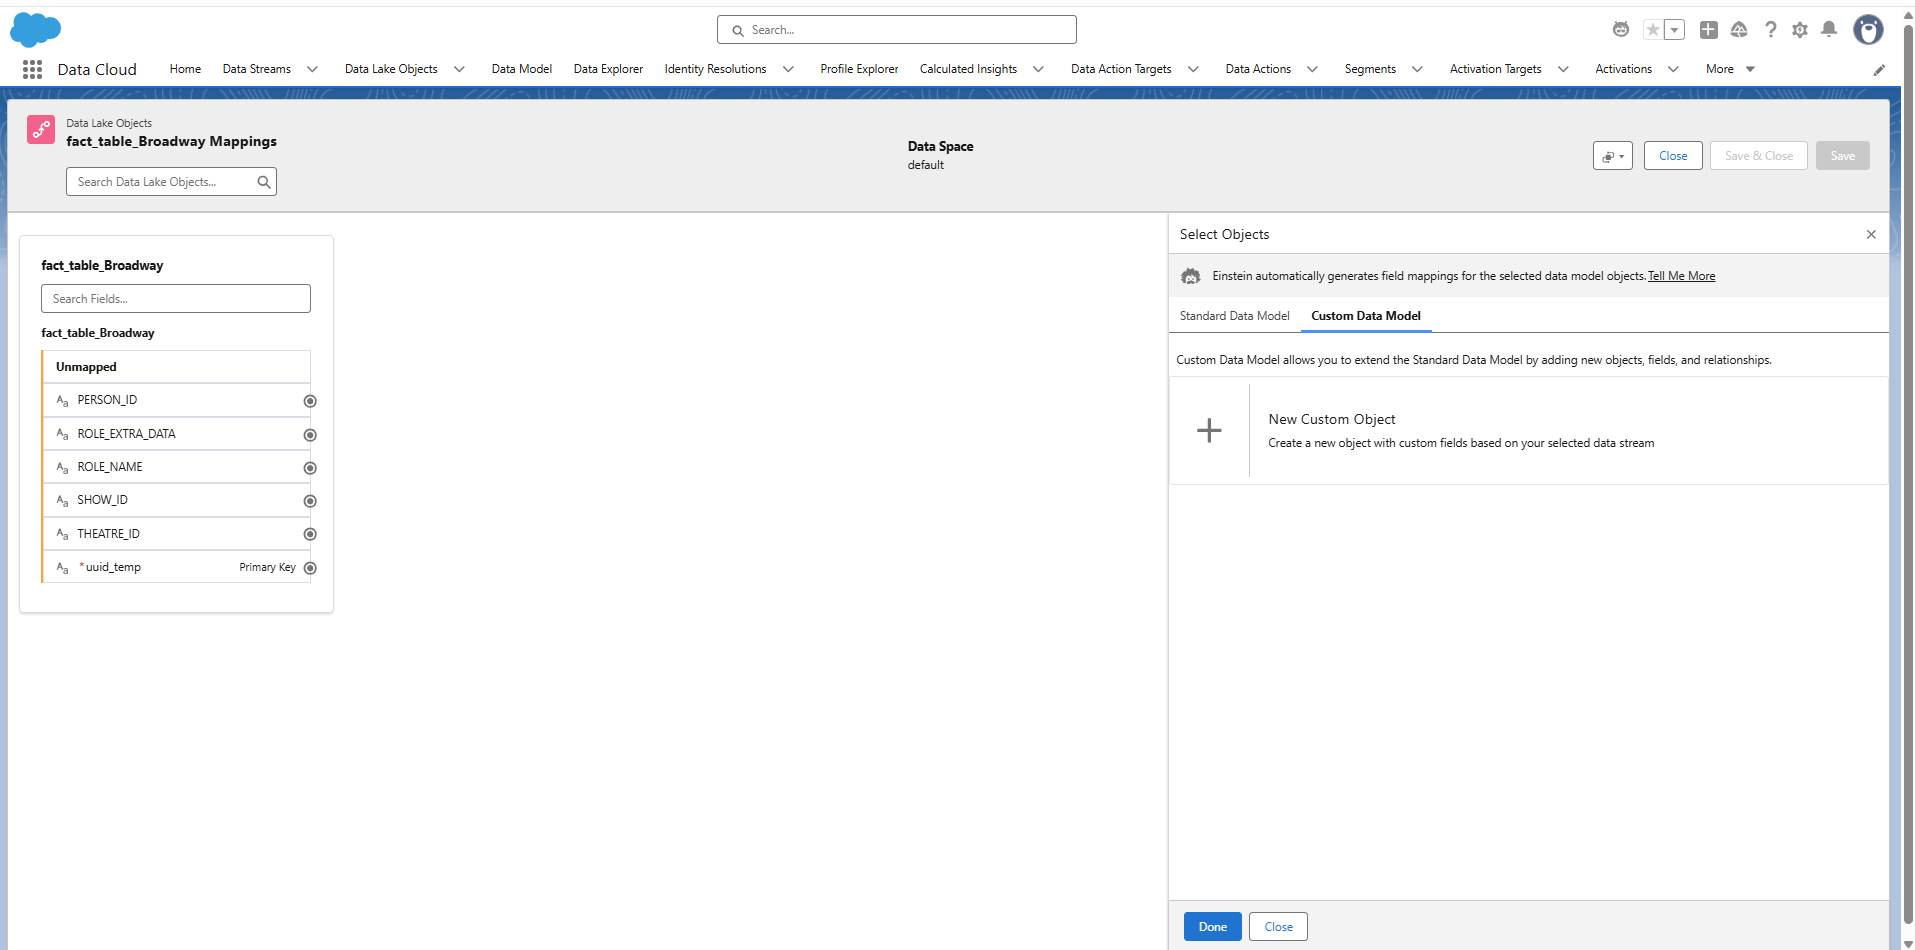
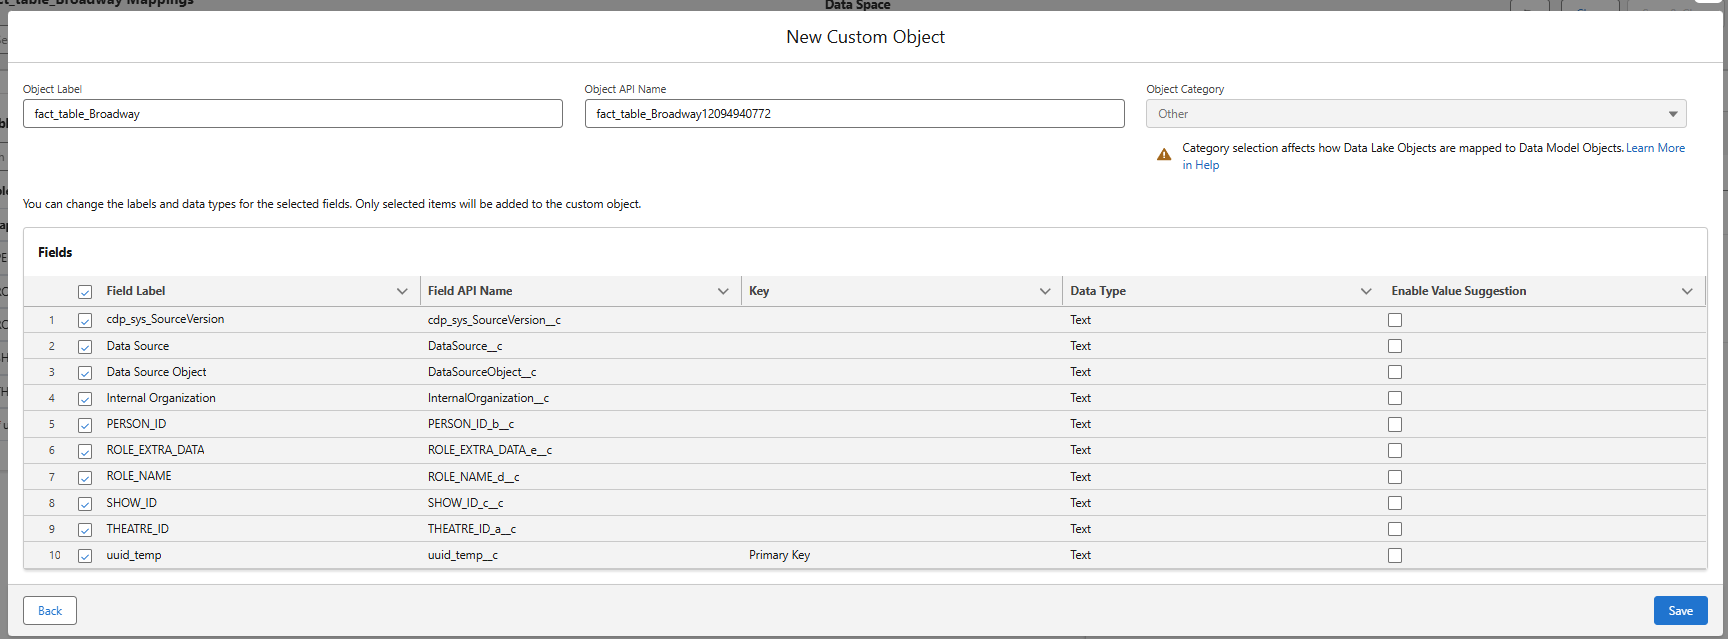
Clicking "New Custom Object" lets you first select among relevant Data Lake Objects as your source (in this case the fact_table_Broadway DLO is the only relevant one so the menu was skipped) and choose the corresponding fields that you want to propagate to the DMO:
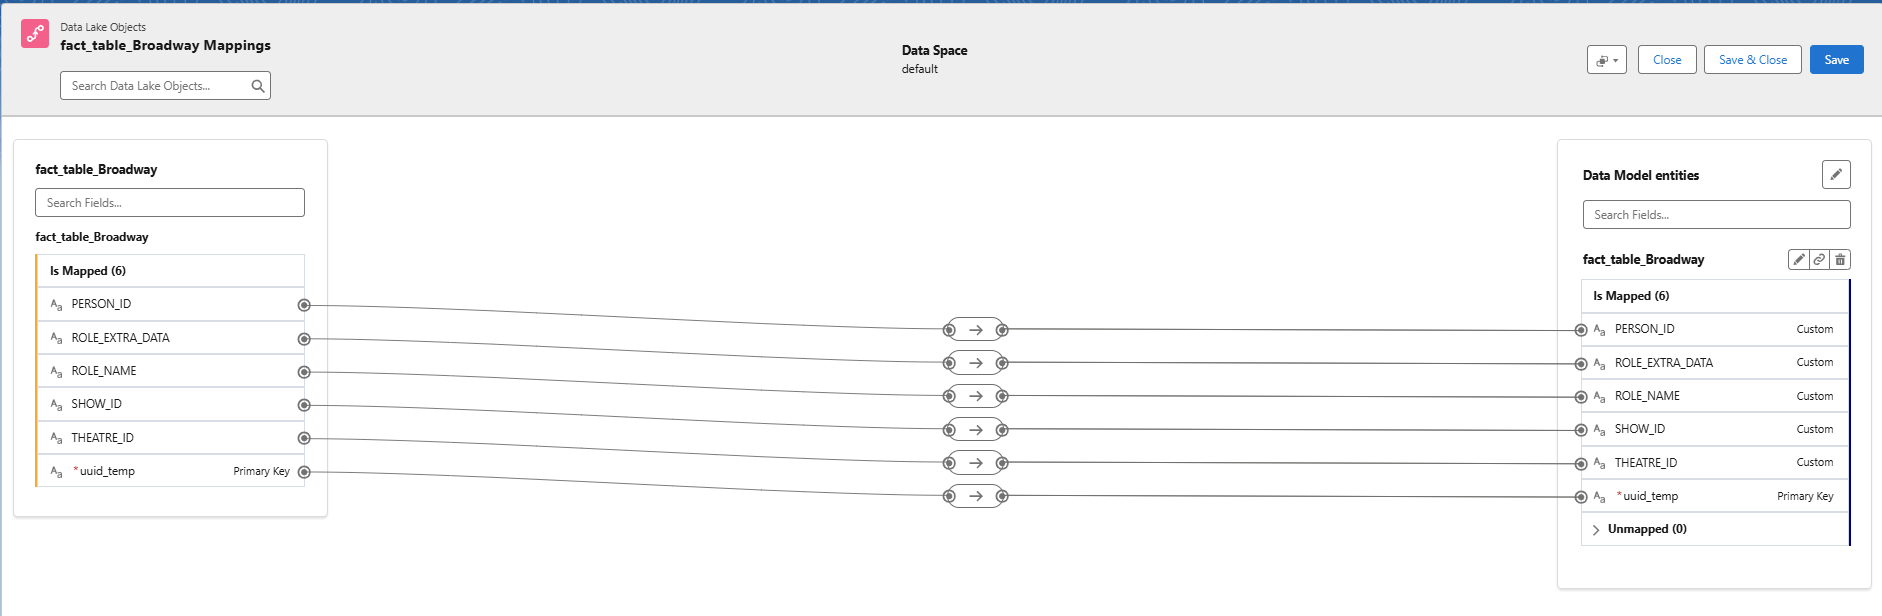
Once saving, you will be returned to the mapping screen complete with new mappings:
Here is where the advantage becomes apparent – in the event of name changes. Let's say we get a new data stream with a new title "fact_table_Broadway_NEW_VERSION" and some different field name choices. With just a DLO this difference would cascade down the pipeline, breaking the logic in semantic models, visualizations, and dashboards. Adding an intermediate DMO makes this process more general.
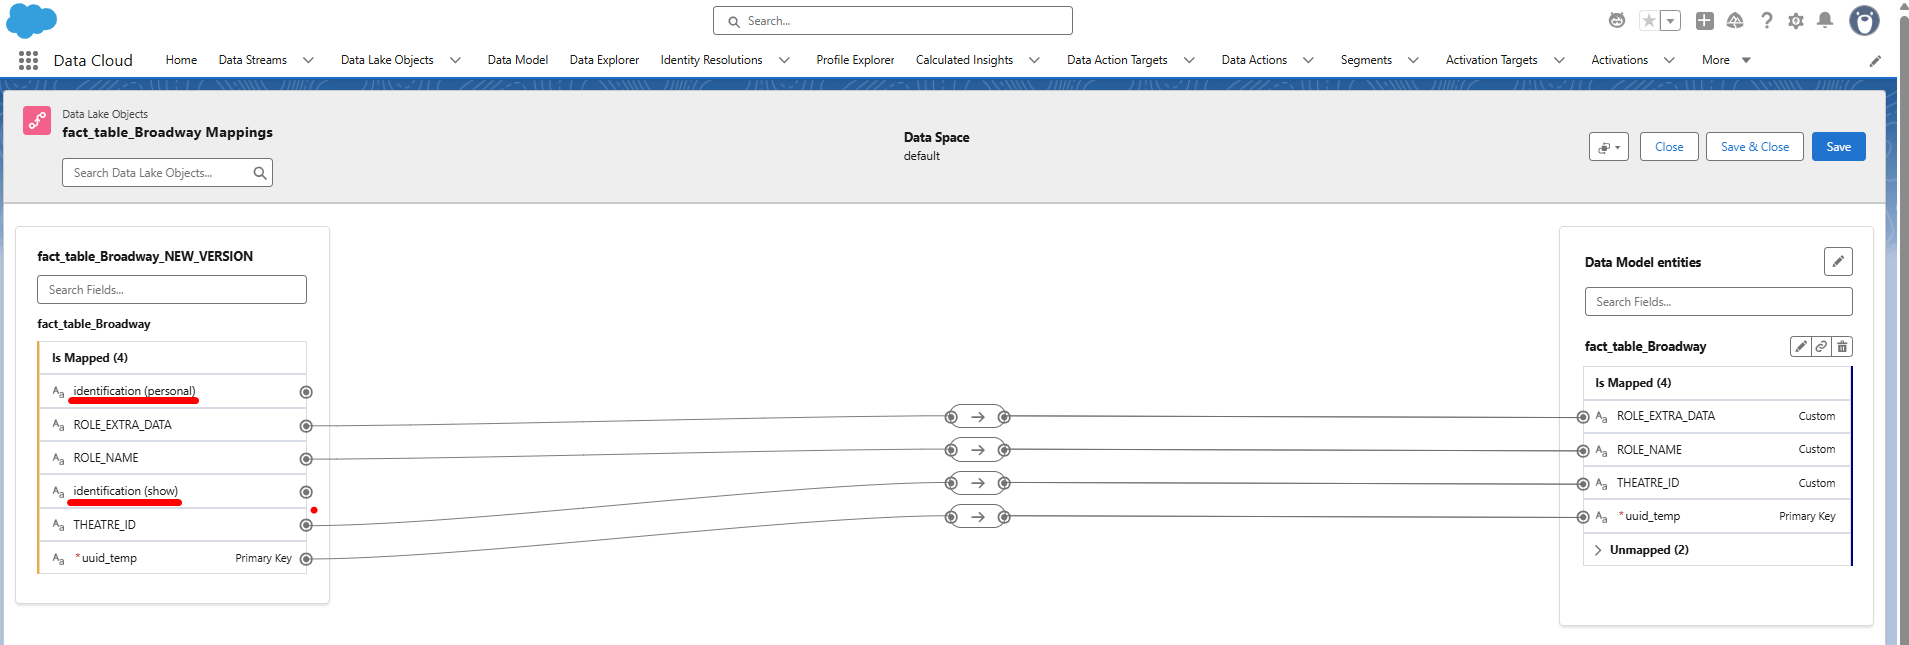
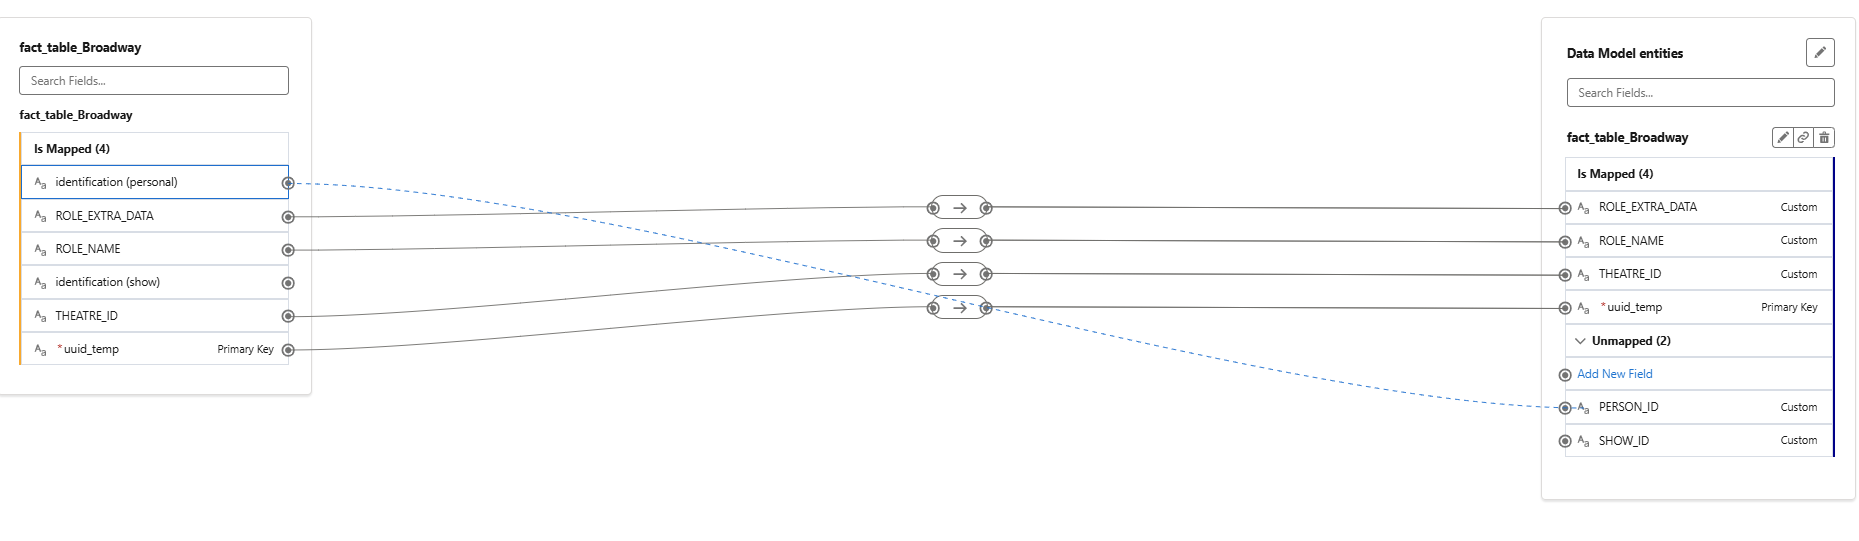
Let's connect those unmapped fields:
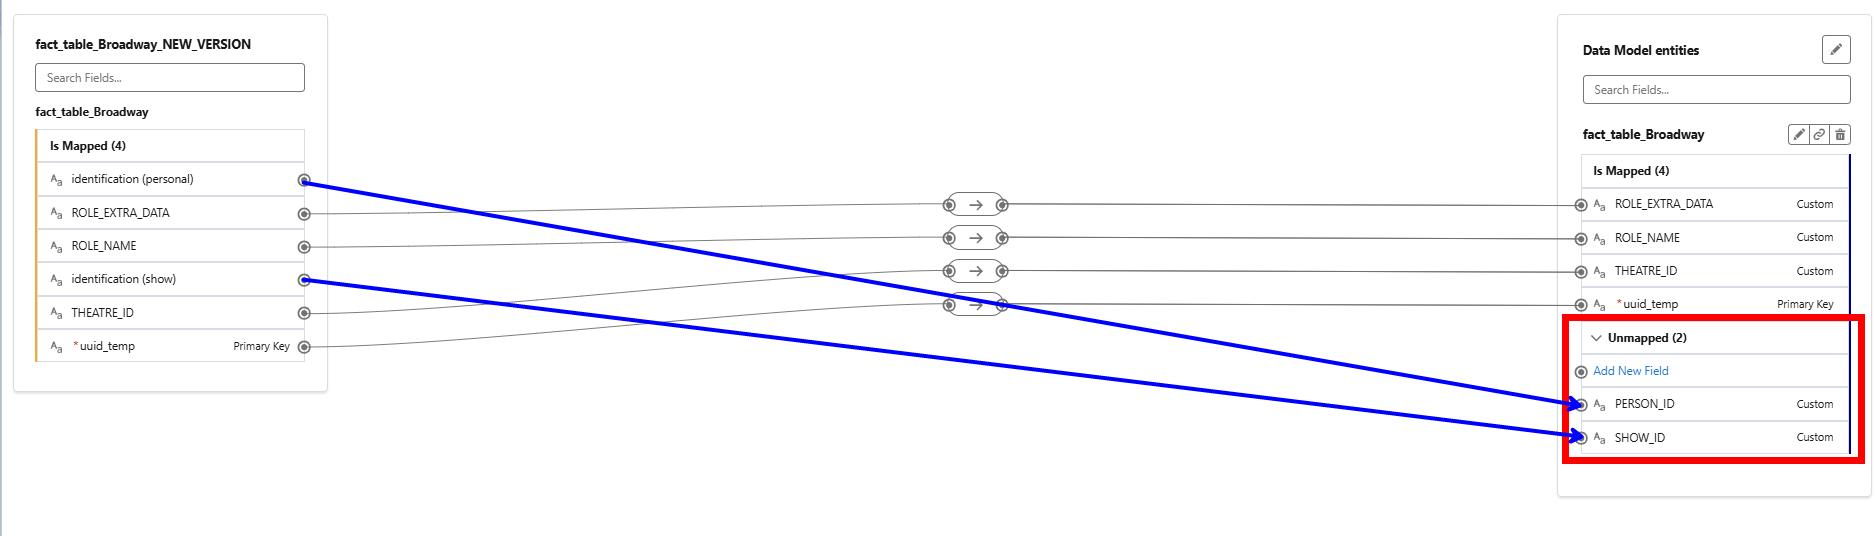
First, open the unmapped fields with the dropdown, click the DLO field you want to map, then hover over the corresponding unmapped DMO field before clicking to set up the connections.
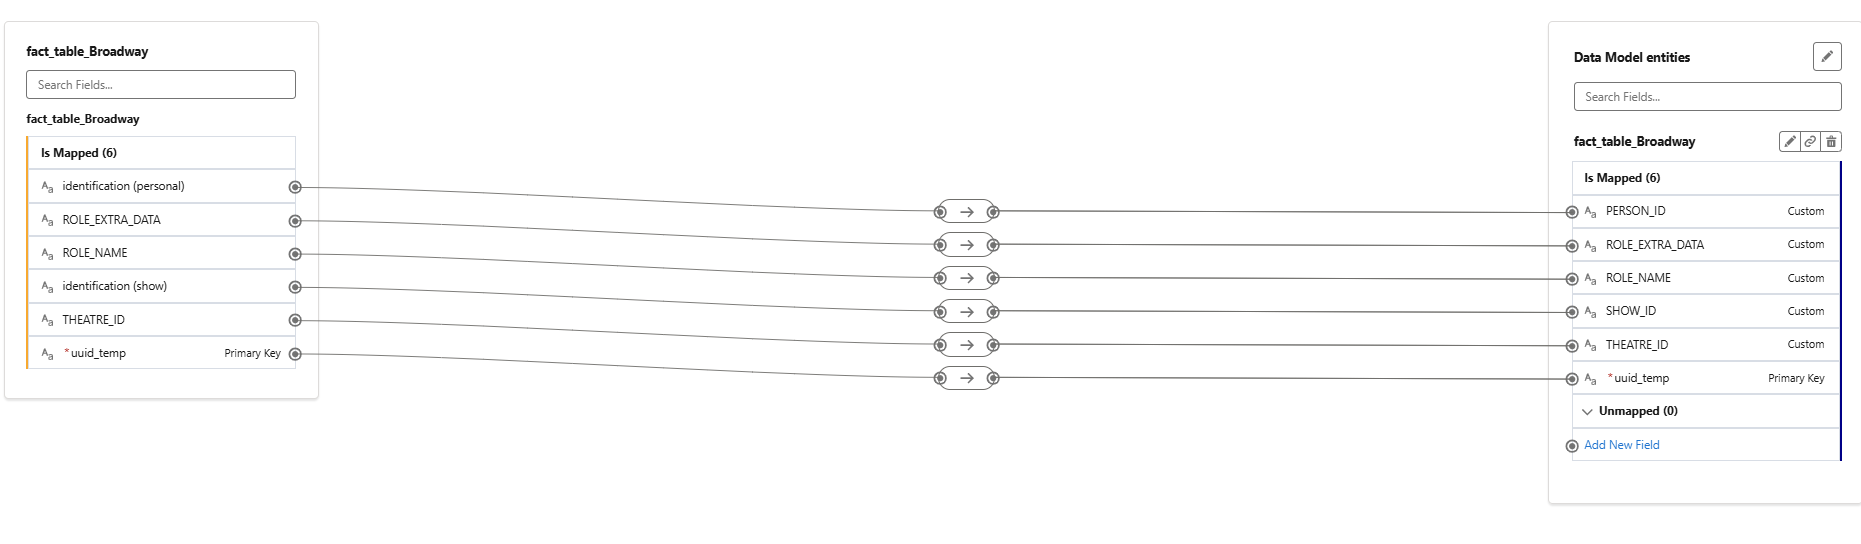
In the end, your mapping will look like this, with adjustments for the new naming that won't propagate throughout the pipeline. Since the semantic model and dashboard have always been receiving the PERSON_ID and SHOW_ID definitions, nothing will change! Only the mapping from the DLO to the DMO changes.
When creating a DMO, it will automatically populate into Tableau Next, as well as your Data Model and Data Explorer tabs, where you can explore and preview the result of your mapping.
The concept of an intermediate "airlock" between tables and dashboards was initially confusing, but given the constant changes made at the database level, DMOs can be a little bit of work in the beginning to prevent major headaches later.